The user can access accounts module in Accounts menu

Account Groups are the collection of Ledgers with the same characteristics. They are used to establish the hierarchy of Ledger Accounts, which aids in the creation of relevant and compliance reporting.The main Account Groups in Proffin are Asset, Income, Expense and Liability.
But users can create, edit or delete Groups as per their necessity.
To access Groups, from the side menu select ACCOUNTS → MASTERS → Account Groups

To create a new account group , enter all the mandatory fields and then click
All mandatory fields are marked with *

To edit an existing account group , enter all the mandatory fields and then click
Please note that System Generated Groups and Linked Groups cannot be edited or deleted.

To delete an existing account group , click .
Please note that System Generated Groups and Linked Groups cannot be edited or deleted. Groups which have child groups or Ledgers created under them cannot also be deleted

A ledger is a book or collection of accounts in which accounting transactions are recorded. Each account has: an opening or brought-forward balance; a list of transactions, each recorded as either a debit or credit in separate columns and an ending or closing, or carry-forward, balance.
But users can create, edit or delete Ledgers as per their necessity.
To access Ledgers, from the side menu select ACCOUNTS → MASTERS → Account Ledgers
There is no need to create a Ledger for Suppliers/Customers. A ledger is already created while adding a new Supplier/Customer.

To create a new account ledger , enter all the mandatory fields and then click
All mandatory fields are marked with *

To edit an existing account ledger , enter all the mandatory fields and then click
Please note that System Generated Ledgers and Linked Ledgers cannot be edited or deleted.

To delete an existing account ledger , click .
Please note that System Generated Ledgers and Linked Ledgers cannot be edited or deleted. Also Ledgers with transactions cannot be deleted.

Inventory products refer to the items or goods that a business holds in stock to meet customer demand. These products are part of a company's inventory, which is essentially the goods and materials a business holds for the ultimate purpose of resale. Inventory products can vary widely depending on the type of business and industry.
But users can create, edit or delete Inventory products as per their necessity.
To access Inventory products, from the side menu select IMS → Masters → Products → Inventory

To create a new inventory product , Click on Add Product and enter all the mandatory fields and then click
All mandatory fields are marked with *
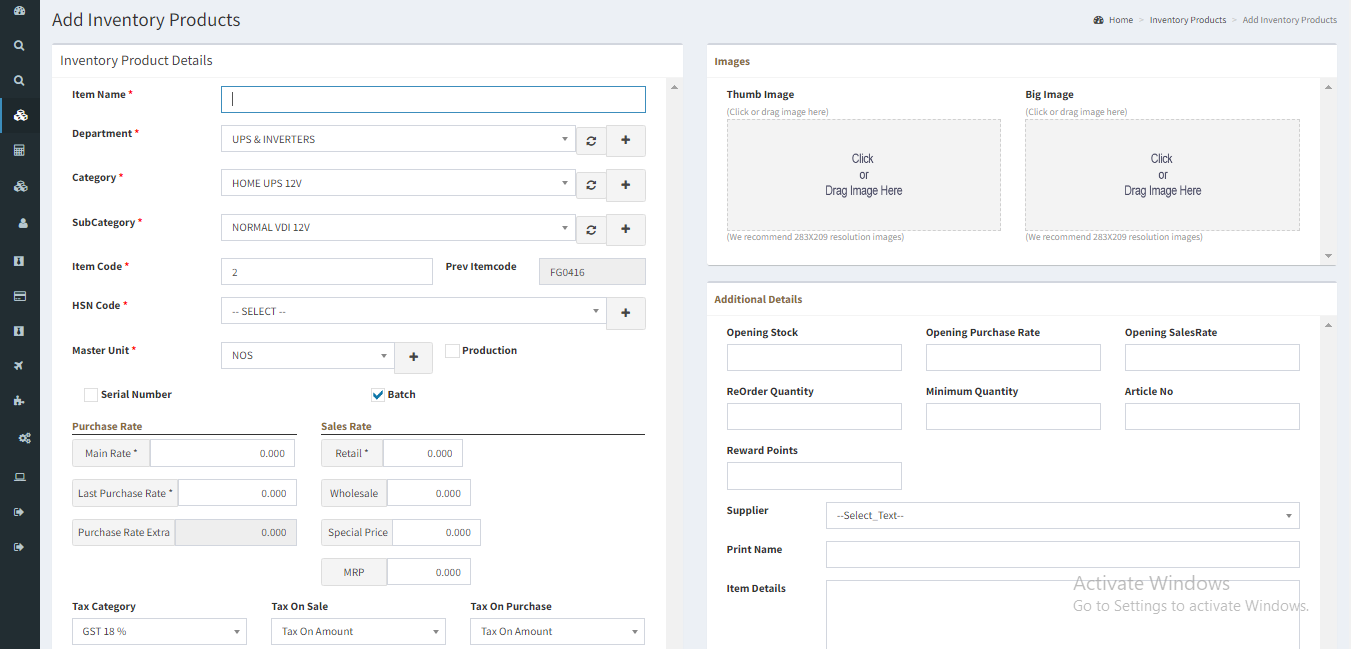
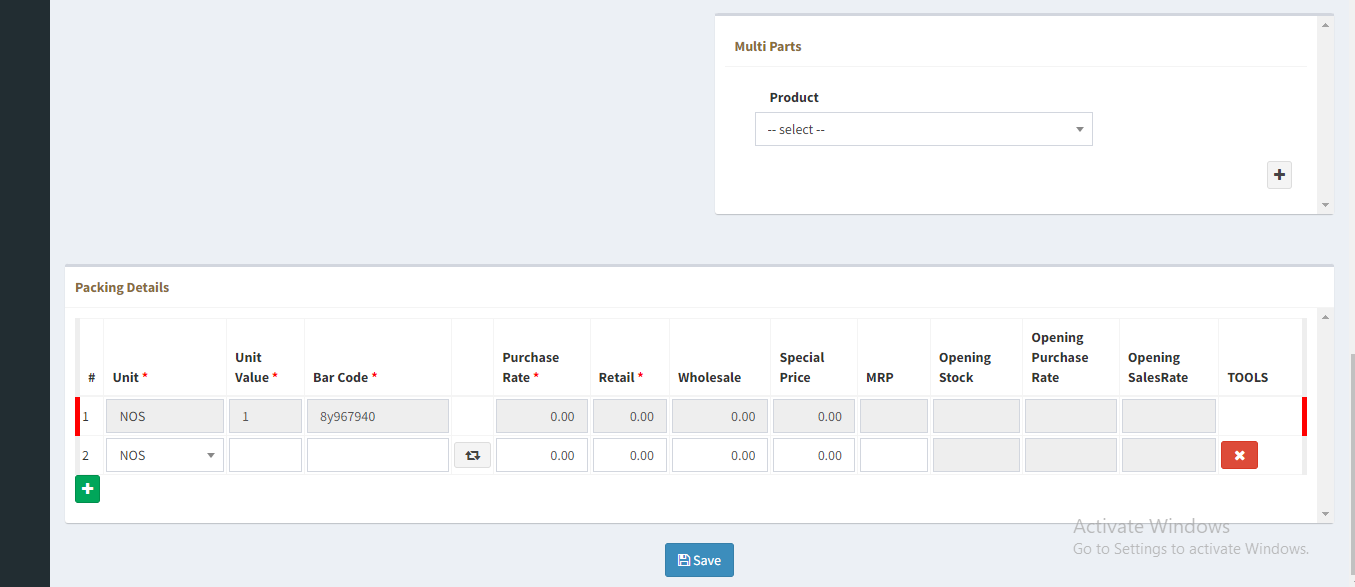
→ Users can add information about how the product is packed or packaged in Packaging Details
→ Click button to add multiple pack detials and Use to remove the row.
→ Click to Generate Barcode.
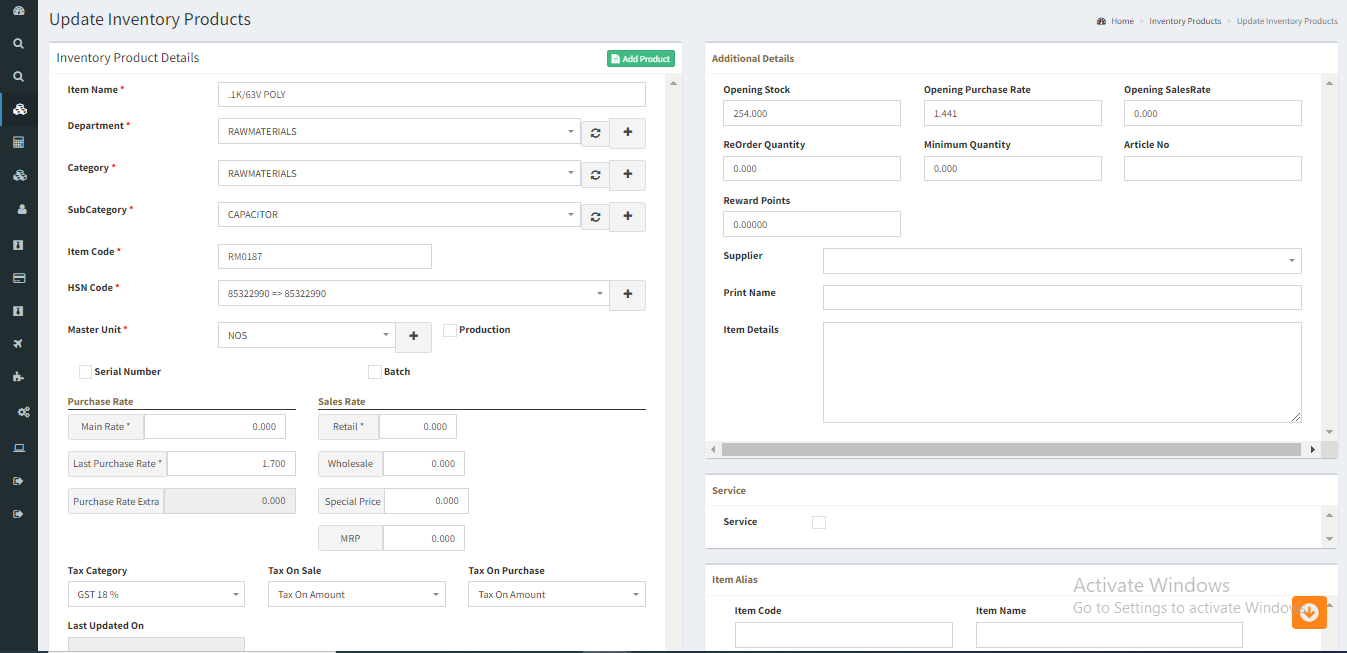
To edit an existing inventory product , enter all the mandatory fields and then click
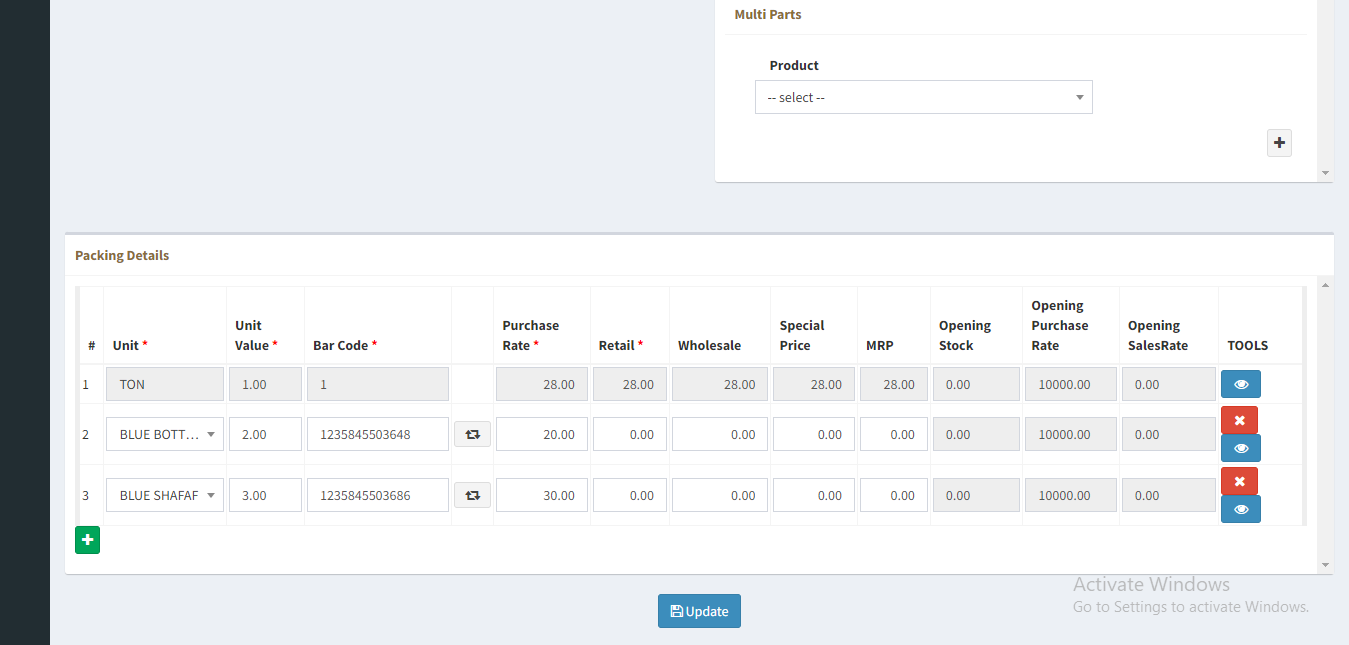
Edit Package details:
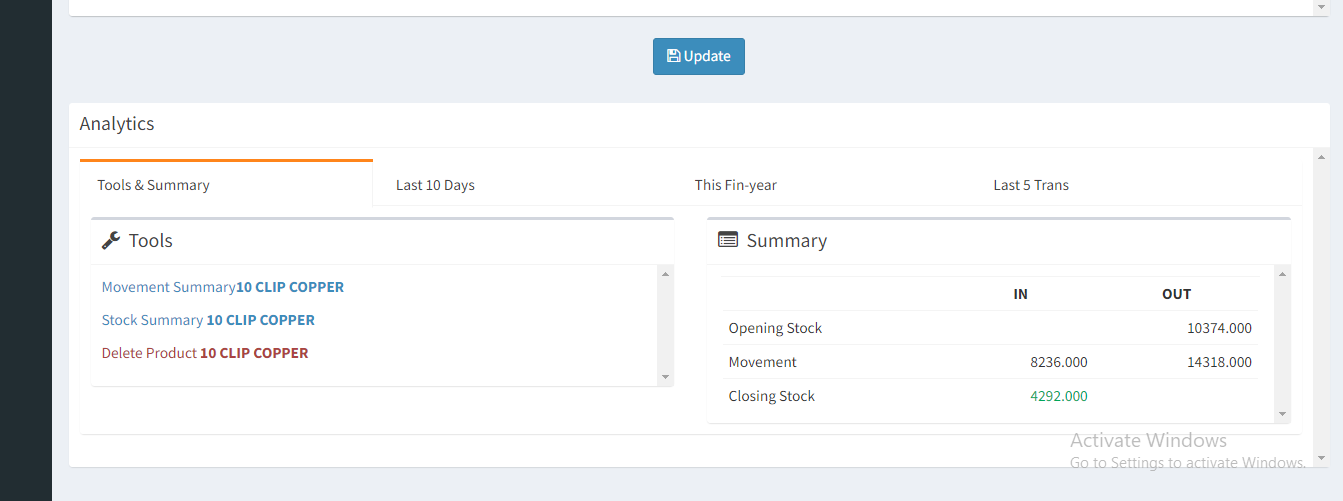
To delete an existing inventory product , click .

To show existing details of inventory product, click button.
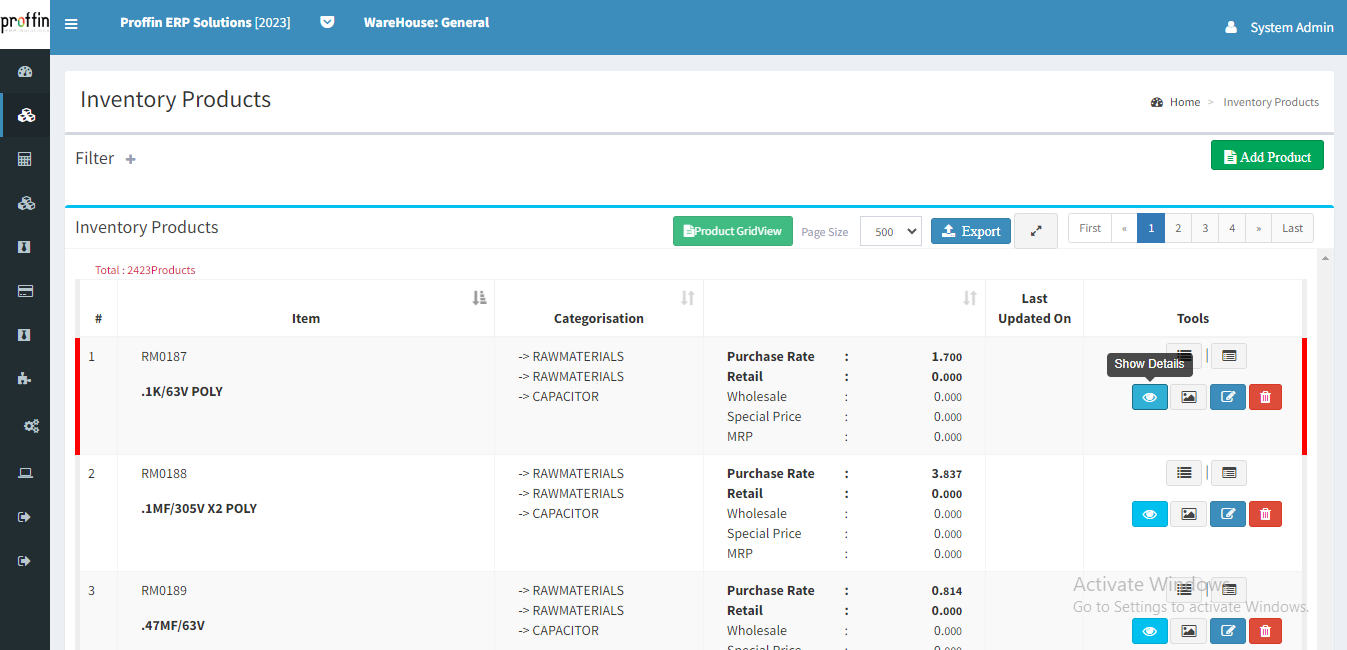
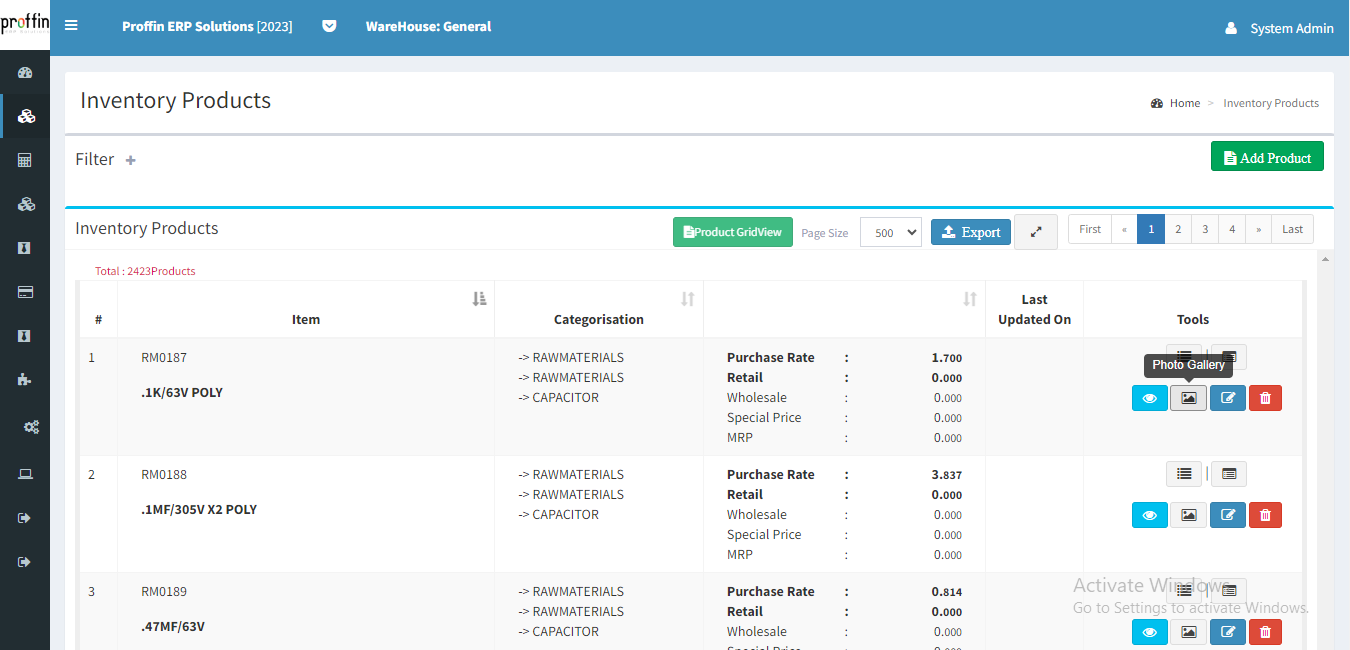
Click to add Images to that inventory product.
Non-inventory products refer to items that a company uses internally and does not intend to sell as part of its primary business operations. These products are typically consumed or used up in the course of business activities and are not held for resale. Unlike inventory products, non-inventory products are not tracked as assets intended for sale.
But users can create, edit or delete Non-Inventory products as per their necessity.
To access Non-Inventory products, from the side menu select IMS → Masters → Products → NonInventory

To create a new Non-Inventory product , Click on Add Product and enter all the mandatory fields and then click
All mandatory fields are marked with *

To edit an existing Non-Inventory product , enter all the mandatory fields and then click

To show existing details of Non-Inventory product, click button.

Click to add Images to that Non-Inventory product.

Combined products typically refer to assembled or bundled items that are treated as a single unit. This is often relevant in businesses where products are created by combining several components or items before being sold as a package.
But users can create, edit or delete Combined products as per their necessity.
To access Combined products, from the side menu select IMS → Masters → Products → Combined

To create a new combined product , Click on Add Product and enter all the mandatory fields and then click
All mandatory fields are marked with *

→ Here users can add multiple items.
→ Click button to add multiple items and Use to remove the row.

To edit an existing combined product , enter all the mandatory fields and then click

Edit combined items Details:


To delete an existing combined product , click .

To show existing details of combined product, click button.

Click to add Images to that combined product.

Department typically refers to a grouping or categorization of items within the inventory. Departments are used to classify and organize inventory items into logical units, which can help streamline the management and tracking of inventory.
But users can create, edit or delete Department as per their necessity.
To access Department, from the side menu select IMS → Masters → Departments

To create a new department , Click on Add Department and enter all the mandatory fields and then click
All mandatory fields are marked with *

To edit an existing department , enter all the mandatory fields and then click

To delete an existing department , click .
Please note that System Generated Departments cannot be deleted and also if the departments are used by other records it cannot be deleted.

To show existing details of Department, click button.

Click to list the Categorised Item Stock details .
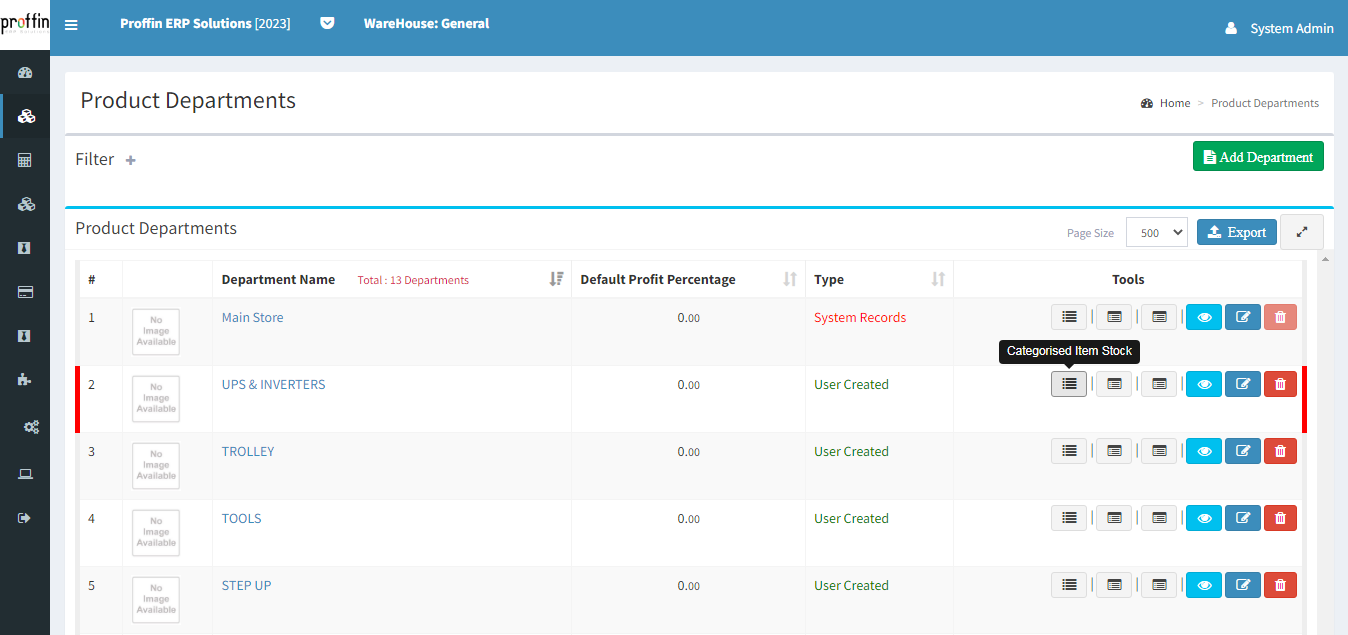
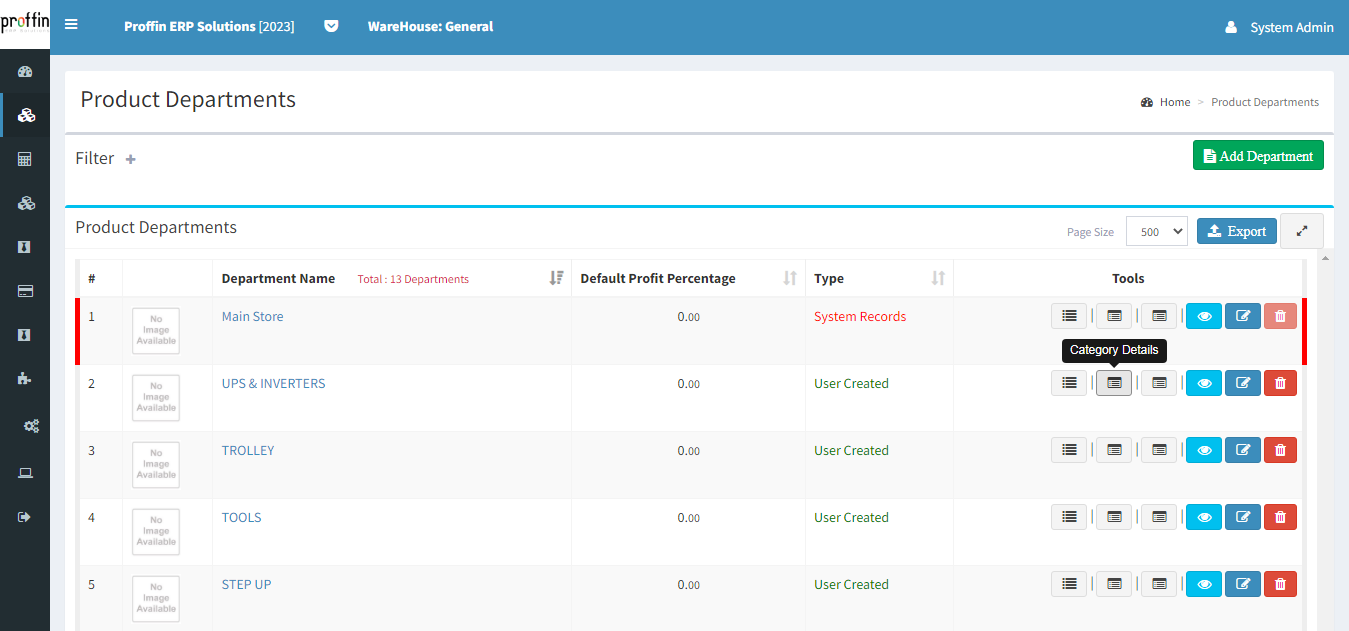
Click to show the list of categories under the curresponding department.
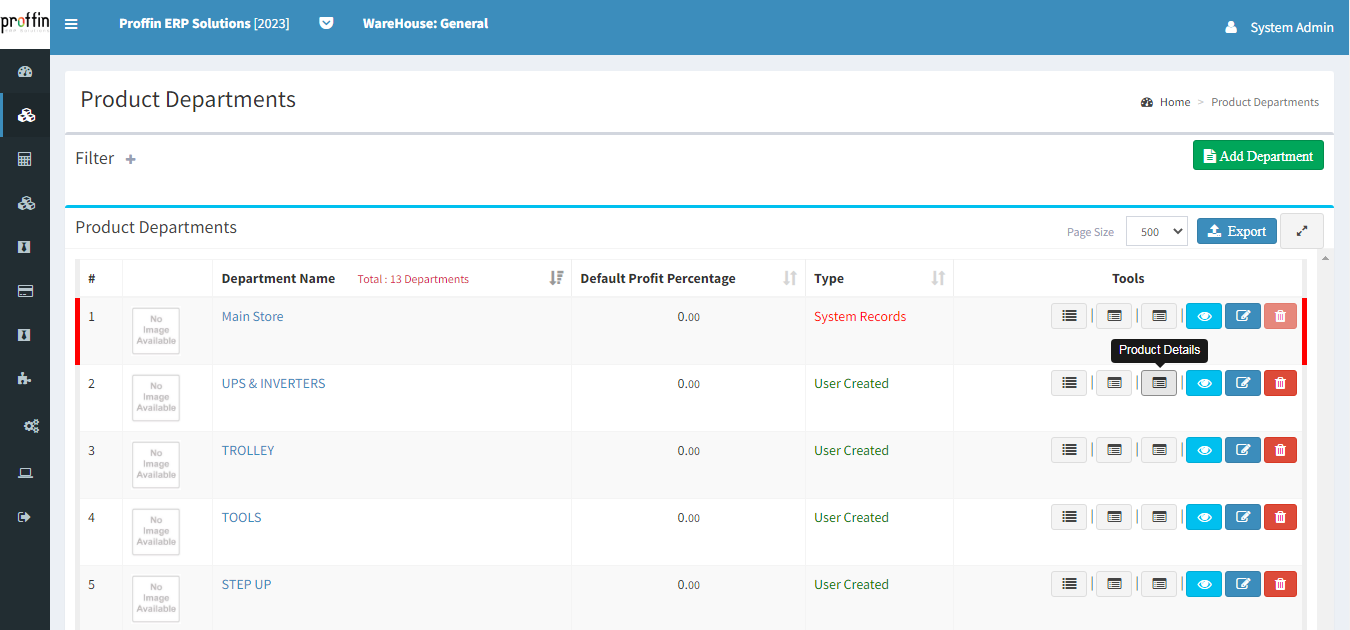
Click to show the list of products under the curresponding department.
Category refers to a way of grouping and organizing products or items based on shared characteristics, attributes, or purposes. Categories are used to help streamline and optimize the management and tracking of inventory.
But users can create, edit or delete Category as per their necessity.
To access Category, from the side menu select IMS → Masters → Categories

To create a new category , Click on Add Category and enter all the mandatory fields and then click
All mandatory fields are marked with *

To edit an existing category , enter all the mandatory fields and then click

To delete an existing category , click .
Please note that System Generated Categories cannot be deleted and also if the Categories are used by other records it cannot be deleted.

To show existing details of Category, click button.

Click to list the Subcategorised Item Stock details .

Click to show the list of subcategories under the curresponding category.

Subcategory is a further refinement or classification of items within a broader category. This structure is particularly valuable when dealing with a wide variety of products or when you need to differentiate items based on unique attributes or characteristics.
But users can create, edit or delete Sub-category as per their necessity.
To access Sub-category, from the side menu select IMS → Masters → Sub-categories

To create a new sub-category , Click on Add SubCategory and enter all the mandatory fields and then click
All mandatory fields are marked with *

To edit an existing sub-category , enter all the mandatory fields and then click

To delete an existing sub-category , click .
Please note that System Generated Sub-categories cannot be deleted and also if the sub-categories are used by other records it cannot be deleted.

To show existing details of Sub-category, click button.

Click to list the Sub-categorised Item Stock details .

Click to show the list of products under the curresponding sub-category.

Our software maintain a centralized database known as the customers, which contains comprehensive information about each customer. This information may include the customer's name, contact details, billing and shipping addresses, payment terms, credit limits, and other relevant details. IMS → Masters → Customers

To create a new Customer , Click on Add Customer and enter all the mandatory fields and then click
All mandatory fields are marked with *

To edit an existing Customer , enter all the mandatory fields and then click
Please note that System Generated Customers cannot be edited or deleted.

To delete an existing customer , click .
Please note that if the customers are used by other records it cannot be deleted.

To show existing details of Customer, click button.

Click Customer-wise transaction summary report.

Our software maintain a centralized database known as the Suppliers, which contains comprehensive information about each Supplier. This information may include the Suppliers's name, contact details, billing and shipping addresses, payment terms, credit limits, and other relevant details. IMS → Masters → Suppliers

To create a new Supplier , Click on Add Supplier and enter all the mandatory fields and then click
All mandatory fields are marked with *

To edit an existing Supplier , enter all the mandatory fields and then click
Please note that System Generated Suppliers cannot be edited or deleted.

To delete an existing supplier , click .
Please note that if the Suppliers are used by other records it cannot be deleted.

To show existing details of supplier, click button.

Click Supplier-wise transaction summary Report.

Warehouse refers to a physical or virtual location where products are stored before being shipped or used.
But users can create, edit or delete Warehouse as per their necessity.
To access Warehouse, from the side menu select IMS → Masters → Warehouse

To create a new warehouse ,Click on Add Warehouse and enter all the mandatory fields and then click
All mandatory fields are marked with *

To edit an existing warehouse , enter all the mandatory fields and then click

To delete an existing warehouse , click .
Please note that System Generated Warehouse cannot be deleted and also if the Warehouses are used by other records it cannot be deleted.

To show existing details of warehouse, click button.

Click to view the warehouse wise Item Stock details .

Units typically refers to a standardized quantity in which a particular item is measured, counted, or tracked.
But users can create, edit or delete Units as per their necessity.
To access Units, from the side menu select IMS → MASTERS → Units

To create a new unit ,Click on Add Unit and enter all the mandatory fields and then click
All mandatory fields are marked with *

To edit an existing unit , enter all the mandatory fields and then click
Please note that Units cannot be edited if they are used in any other records.

To delete an existing unit , click .
Please note that Units cannot be deleted if they are used in any other records.

To show existing details of unit, click button.

HSN codes are a standardized international system for classifying products in trade. These codes help in identifying and categorizing products based on their characteristics.
But users can create, edit or delete HSN Codes as per their necessity.
To access Units, from the side menu select IMS → MASTERS → HSN Codes

To create a new HSN Code ,Click on Add HSN Codes and enter all the mandatory fields and then click
All mandatory fields are marked with *

To edit an existing HSN Code , enter all the mandatory fields and then click

To delete an existing HSN Code , click .

Customer Types typically refers to the categorization of clients or buyers based on specific criteria related to inventory interactions.
But users can create, edit or delete Customer Types as per their necessity.
To access Customer Types, from the side menu select IMS → MASTERS → Other Masters → Customer Types

To create a new customer type ,Click on Add Customer Type and enter all the mandatory fields and then click
All mandatory fields are marked with *

To edit an existing customer type , enter all the mandatory fields and then click
Please note that System Generated Customer Type cannot be edited or deleted.

To delete an existing customer type , click .
Customer Types cannot be deleted if they are used in any other records.

To show existing details of customer type, click button.

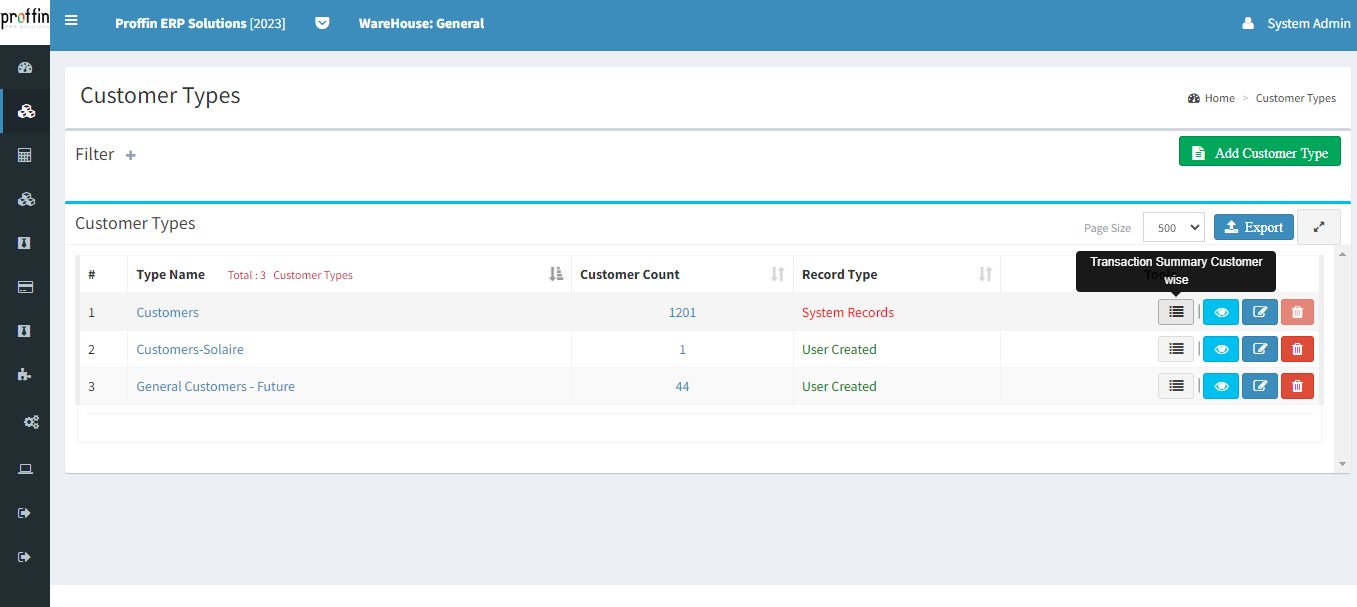
Click to list the customer type wise Transaction Summary Details.
Store-Block refers grouping products or items together in designated blocks or sections within a storage facility.
But users can create, edit or delete Block as per their necessity.
To access Store-Block, from the side menu select IMS → MASTERS → Other Masters → Store-Block

To create a new block ,Click on Add Block and enter all the mandatory fields and then click
All mandatory fields are marked with *

To edit an existing block , enter all the mandatory fields and then click

To delete an existing block , click .

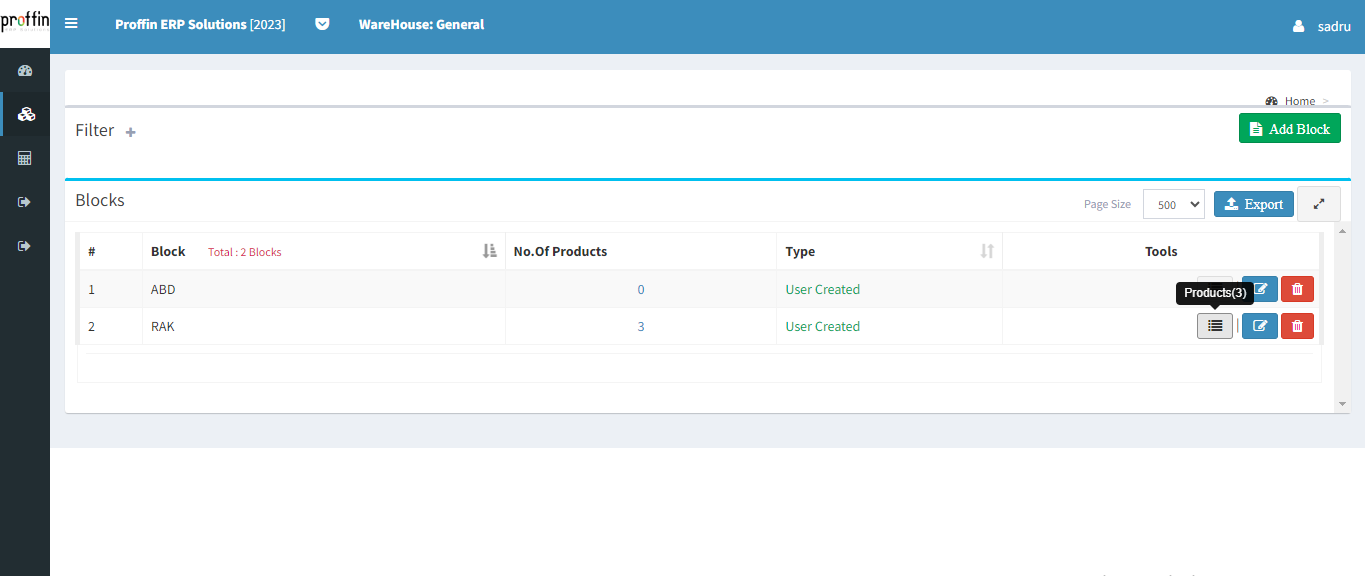
Click to show the list of products under the block.
The concept of Store-Column signifies an organizational structure where products or items are arranged in sequential Column for systematic storage and retrieval.
But users can create, edit or delete Column as per their necessity.
To access Store-Column, from the side menu select IMS → MASTERS → Other Masters → Store-Column

To create a new column , Click on Add Column and enter all the mandatory fields and then click
All mandatory fields are marked with *

To edit an existing column , enter all the mandatory fields and then click

To delete an existing column , click .

Click to show the list of products under the column.

The concept of Store-Rows signifies an organizational structure where products or items are arranged in sequential rows for systematic storage and retrieval.
But users can create, edit or delete Row as per their necessity.
To access Store-Rows, from the side menu select IMS → MASTERS → Other Masters → Store-Rows

To create a new row ,Click on Add Row and enter all the mandatory fields and then click
All mandatory fields are marked with *

To edit an existing row , enter all the mandatory fields and then click

To delete an existing row , click .

Click to show the list of products under the row.

Supplier Types typically refers to categorization of vendors or suppliers based on specific criteria significant to inventory-related operations.
But users can create, edit or delete Supplier Types as per their necessity.
To access Supplier Types, from the side menu select IMS → MASTERS → Other Masters → Supplier Types

To create a new supplier type , Click on Add Supplier Type and enter all the mandatory fields and then click
All mandatory fields are marked with *

To edit an existing supplier type , enter all the mandatory fields and then click
Please note that System Generated Supplier Type cannot be edited or deleted.

To delete an existing supplier type , click .
Supplier Type cannot be deleted if they are used in any other records.

To show existing details of supplier type, click button.

Click to list the supplier type wise Transaction Summary Details.

Agents typically refers to individuals or entities responsible for managing specific aspects of the inventory-related processes.
But users can create, edit or delete Agents as per their necessity.
To access Agents, from the side menu select IMS → MASTERS → Other Masters → Agents

To create a new agent , Click on Add Agent and enter all the mandatory fields and then click
All mandatory fields are marked with *

To edit an existing agent , enter all the mandatory fields and then click

To delete an existing agent , click .
Agents cannot be deleted if they are used in any other records.

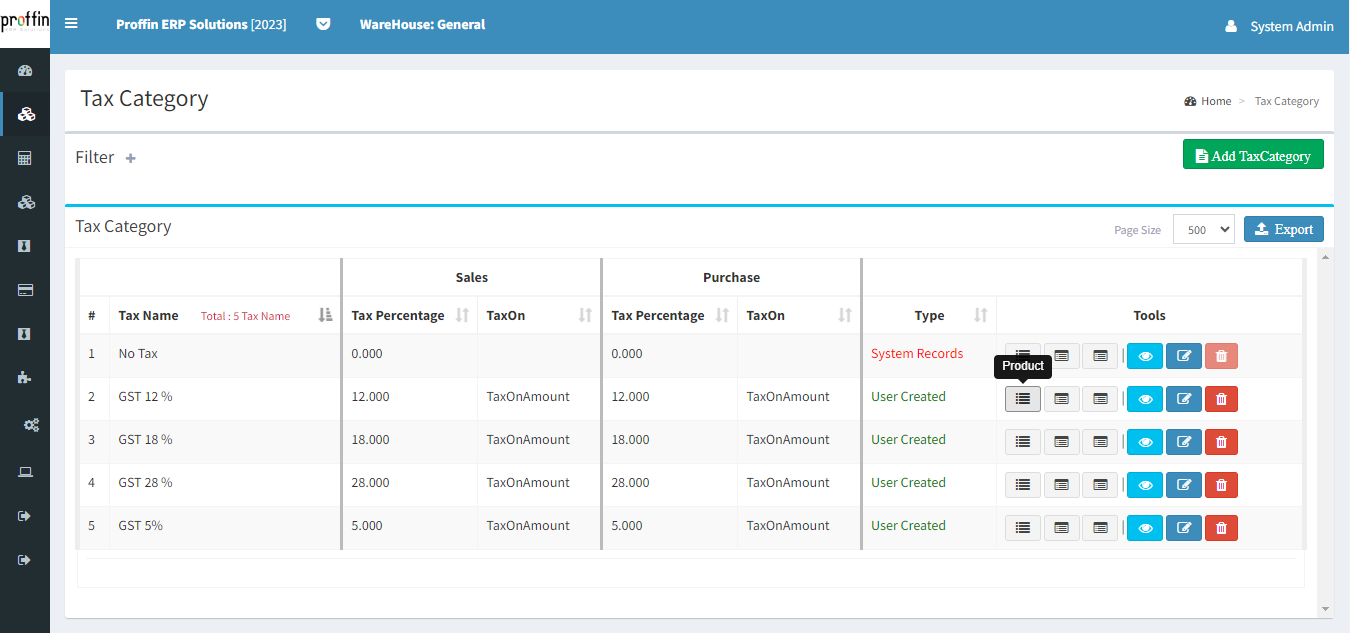
Tax Category is a classification or grouping mechanism used to categorize and manage different types of taxes associated with products. This classification is crucial for accurately calculating and applying taxes to transactions within the system.
But users can create, edit or delete Tax Category as per their necessity.
To access Tax Category, from the side menu select IMS → MASTERS → Other Masters → Tax Category

To create a new tax category , Click on Add Tax Category and enter all the mandatory fields and then click
All mandatory fields are marked with *
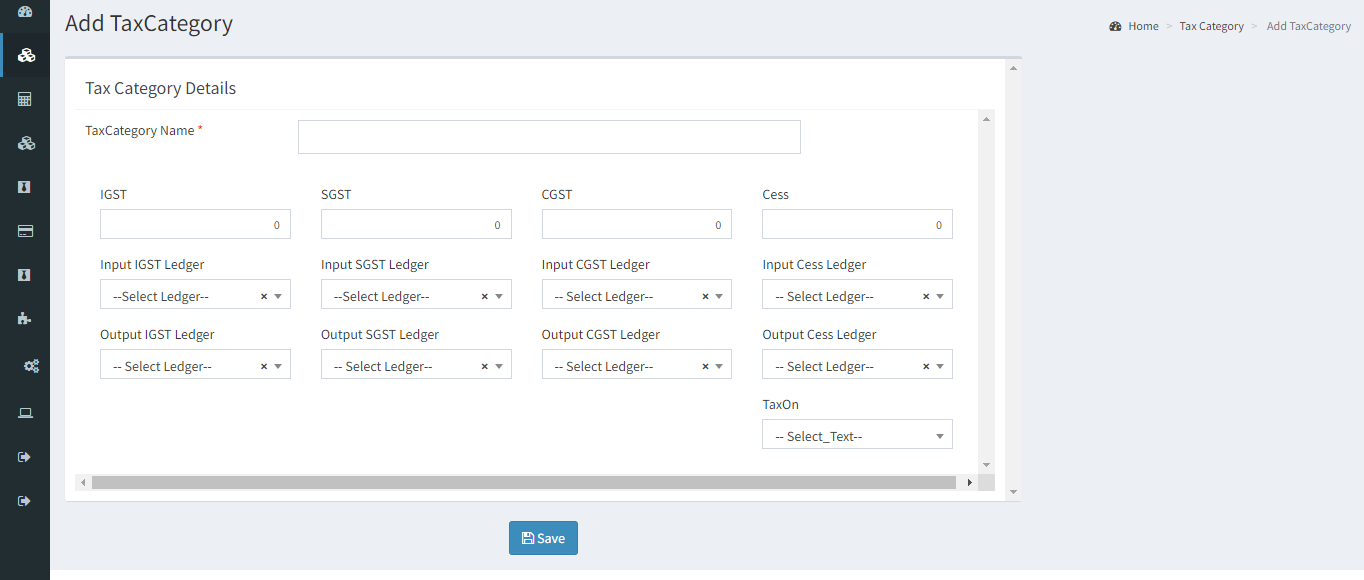
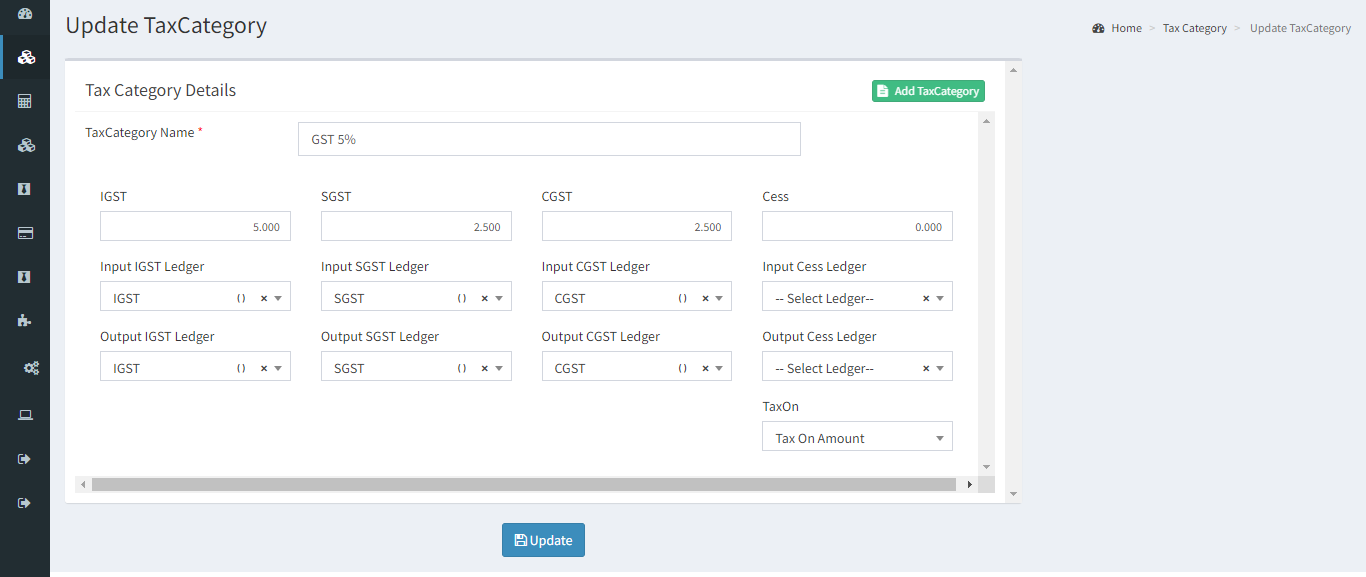
To edit an existing tax category , enter all the mandatory fields and then click
Please note that System Generated Tax Categories cannot be edited or deleted.
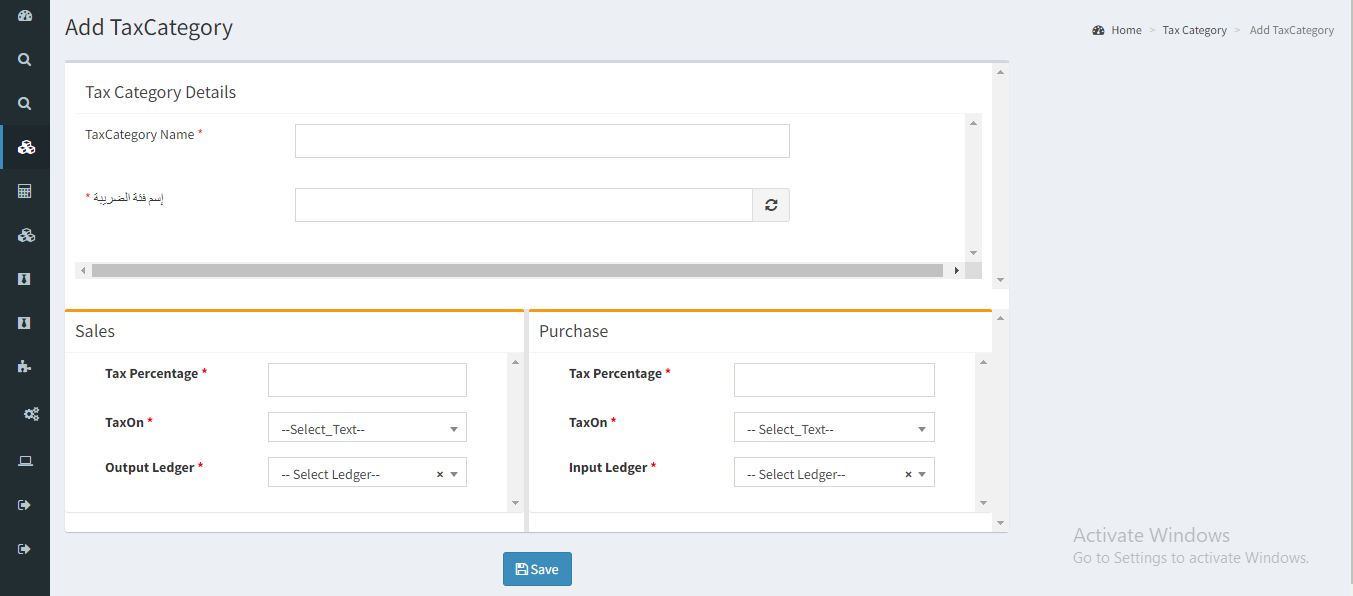
To create a new tax category , Click on Add Tax Category and enter all the mandatory fields and then click
All mandatory fields are marked with *
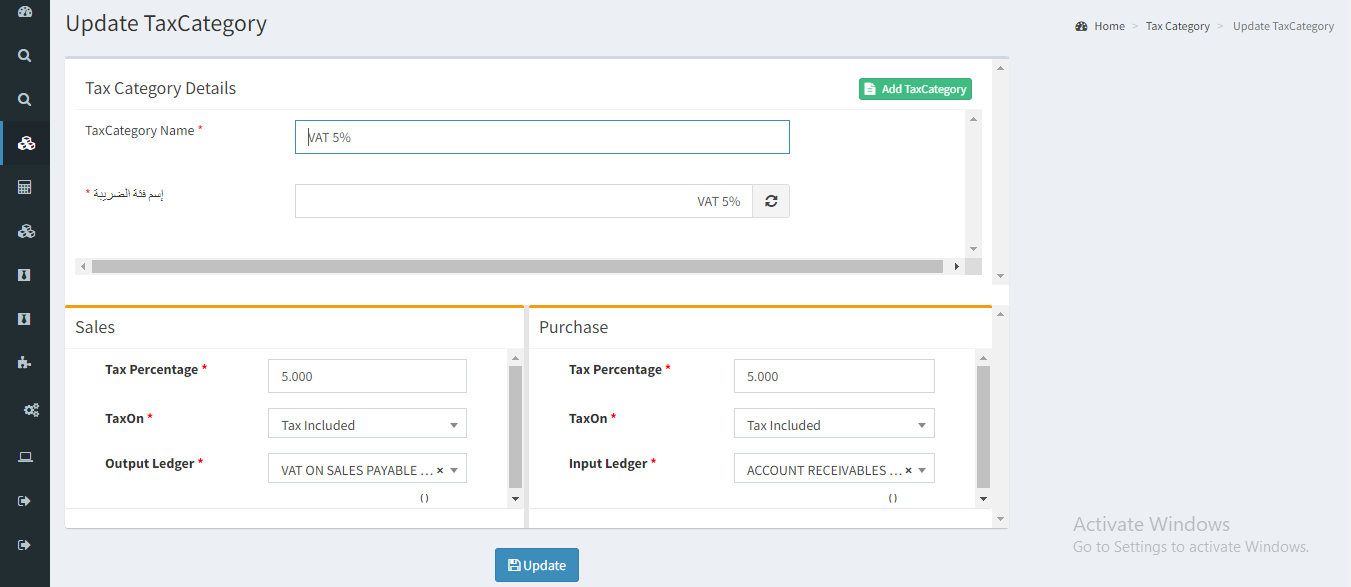
To edit an existing tax category , enter all the mandatory fields and then click
Please note that System Generated Tax Categories cannot be edited or deleted.
To delete an existing tax category , click .
Tax Category cannot be deleted if they are used in any other records.

Click to show the list of products under the curresponding Tax Category.
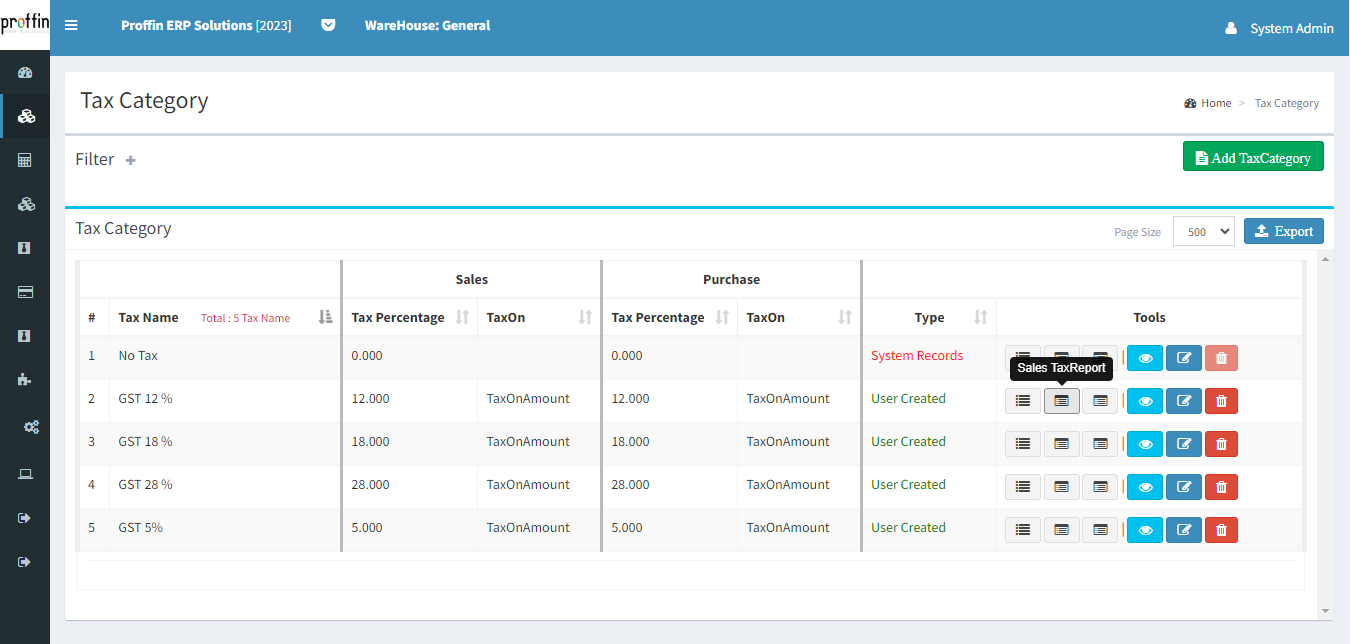
Click to show the Sales Tax Summary Report.
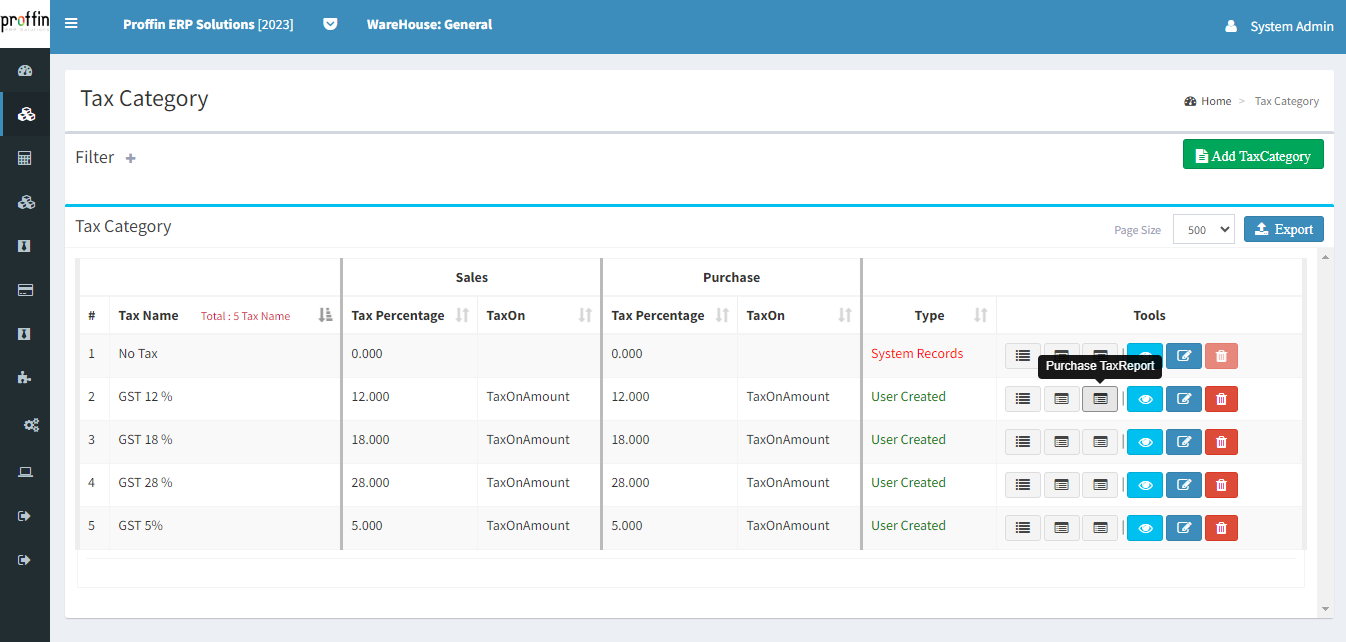
Click to show the Purchase Tax Summary Report.
To show existing details of tax category, click button.

Sub-transaction types refer to specific categories or classifications of transactions that occur within the system. These sub-types help to further categorize and define the nature of inventory-related activities.
But users can create, edit or delete Sub-Transaction Type as per their necessity.
To access Sub-Transaction Type, from the side menu select IMS → MASTERS → Other Masters → Sub-Transaction Type

To create a new sub-transaction type , Click on Add SubTransaction Type and enter all the mandatory fields and then click
All mandatory fields are marked with *

To edit an existing sub-transaction type , enter all the mandatory fields and then click
Please note that System Generated Sub-Transaction Type cannot be edited or deleted.

To delete an existing Sub-Transaction Type , click .
Sub-Transaction Type cannot be deleted if they are used in any other records.

Click to add New Transaction in the curresponding sub-transaction type.
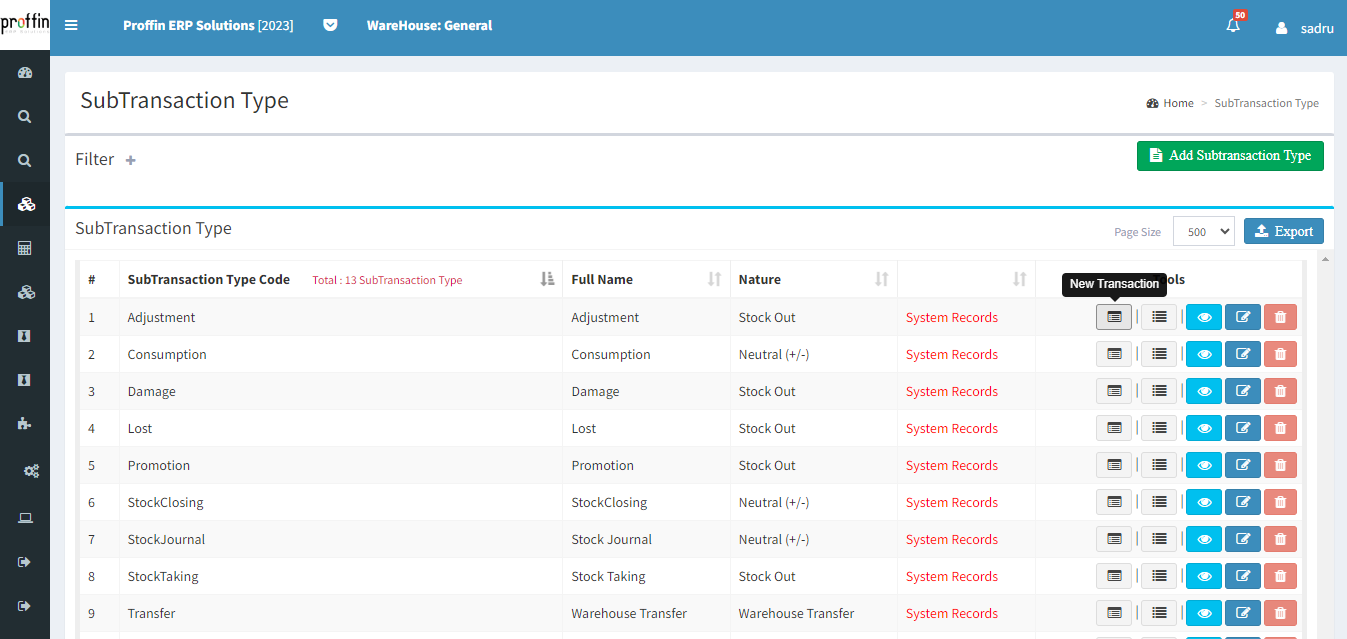
Click to add New Transaction in the curresponding sub-transaction type.

Click to show the Transaction Summary Details.
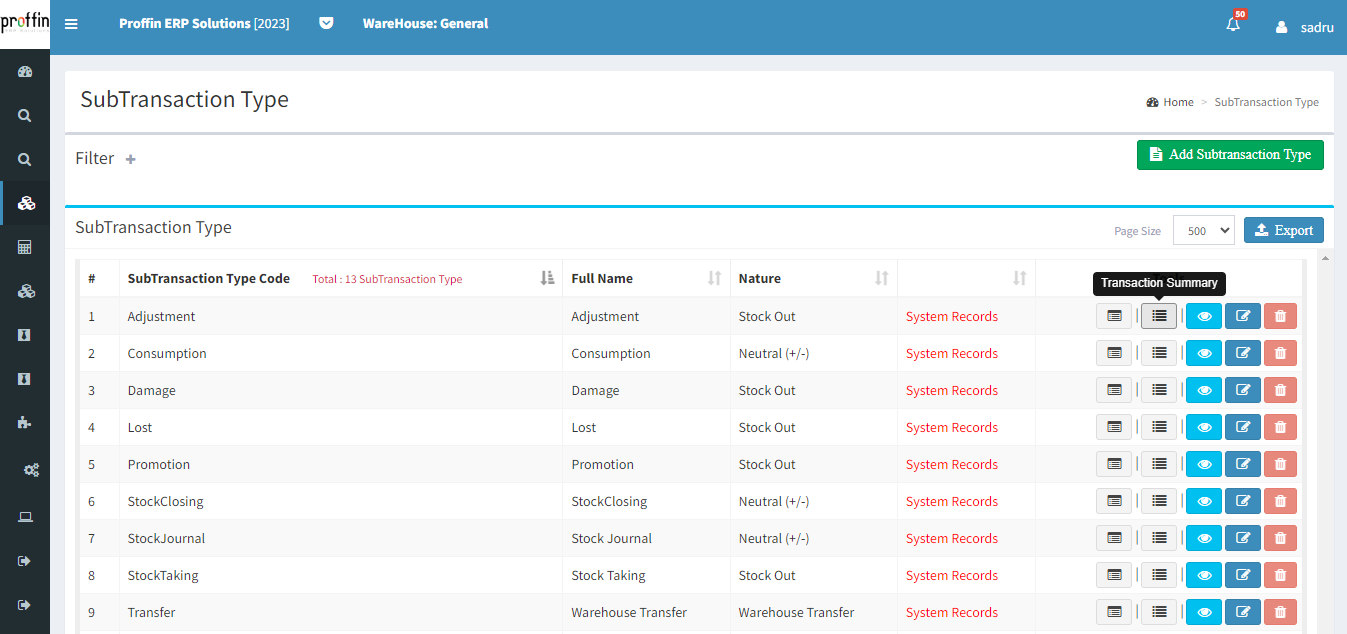
To show existing details of sub-transaction type, click button.

the Transaction Extra Amount Field is typically used to capture any additional costs associated with a specific inventory transaction.
But users can create, edit or delete Extra Amount Field as per their necessity.
To access Transaction Additional Cost, from the side menu select IMS → MASTERS → Other Masters → Transaction Additional Cost

To create a new extra amount field , Click on Add Transaction Extra Amount Field and enter all the mandatory fields and then click
All mandatory fields are marked with *

To edit an existing extra amount field , enter all the mandatory fields and then click

To delete an existing extra amount field , click .
Extra Amount Field cannot be deleted if they are used in any other records.

To show existing details of extra amount field, click button.

Counters play a crucial role in keeping track of the quantities of items within each warehouse. Each warehouse typically has its own set of counters, and these counters are used to monitor and manage the inventory levels in that specific location.
But users can create, edit or delete Counters as per their necessity.
To access Counter, from the side menu select IMS → MASTERS → Other Masters → Counter

To create a new counter , Click on Add CounterMaster and enter all the mandatory fields and then click
All mandatory fields are marked with *

To edit an existing counter , enter all the mandatory fields and then click
Please note that System Generated Counter cannot be edited or deleted.

To delete an existing counter , click .
Counters cannot be deleted if they are used in any other records.

To show existing details of counter, click button.

Route Master used for capturing information about the route where a customer is based.
But users can create, edit or delete Route Master as per their necessity.
To access Route Master, from the side menu select IMS → MASTERS → Other Masters → Route Master

To create a new route , Click on Add New and enter all the mandatory fields and then click
All mandatory fields are marked with *

To edit an existing route , enter all the mandatory fields and then click

To delete an existing route , click .
Routes cannot be deleted if they are used in any other records.

Route Places used for capturing information about the location where a customer is based.
But users can create, edit or delete Route Places as per their necessity.
To access Route Places, from the side menu select IMS → MASTERS → Other Masters → Route Places

To create a new route place , Click on Add New and enter all the mandatory fields and then click
All mandatory fields are marked with *

To edit an existing route place , enter all the mandatory fields and then click

To delete an existing route place , click .
Route Place cannot be deleted if they are used in any other records.

Route Date used for capturing information about the location where a customer is based and location added date .
But users can create, edit or delete Route Date as per their necessity.
To access Route Date, from the side menu select IMS → MASTERS → Other Masters → Route Date

To create a new route date , Click on Add New and enter all the mandatory fields and then click
All mandatory fields are marked with *

To edit an existing route date , enter all the mandatory fields and then click

To delete an existing route date , click .
Route Date cannot be deleted if they are used in any other records.

Used for Assigning Routes to customers .This functionality streamlines the delivery process, enhances efficiency, and improves customer service.
But users can create, edit or delete Assigned Routes as per their necessity.
To access Route Assigning, from the side menu select IMS → MASTERS → Other Masters → Route Assigning

→ To assign routes to customers , Enter all the mandatory fields and then click .
All mandatory fields are marked with
*
→ User can add multiple cutomers under a Route. Click to add multiple customers.
→ Click button to clear data of that corresponding row.

→ Select the Route Master where the customers to be changed.
→ Delete existing cutomers using button and add new customers.
→ click to update all changes

Target Period is a defined timeframe during which specific goals or objectives are set for individuals or teams.
But users can create, edit or delete Target Period as per their necessity.
To access Target Period, from the side menu select IMS → MASTERS → Other Masters → Target Period

To create a new target period , Click on Add New and enter all the mandatory fields and then click
All mandatory fields are marked with *

To edit an existing target period , enter all the mandatory fields and then click

To delete an existing target period , click .
Target Period cannot be deleted if they are used in any other records.

Employee target refers to a specific, measurable goal or objective set for an individual employee within an organization.
But users can create, edit or delete Employee Target as per their necessity.
To access Employee Target, from the side menu select IMS → MASTERS → Other Masters → Employee Target

To create a new employee target , Click on Add New and enter all the mandatory fields and then click
All mandatory fields are marked with *

To edit an existing employee target , enter all the mandatory fields and then click

To delete an existing employee target , click .

To show existing details of employee target, click button.

This report helps to quickly assess the availability of each product across all warehouses. It helps in making informed decisions about restocking, distribution, and optimizing inventory levels based on demand and supply chain considerations.
To access Product Search, from the side menu select IMS → REPORTS → Product Search

Type Product details on the search tab.
To expand the product filtration click button on the top.

Click to view the Item Stock Movement Report.
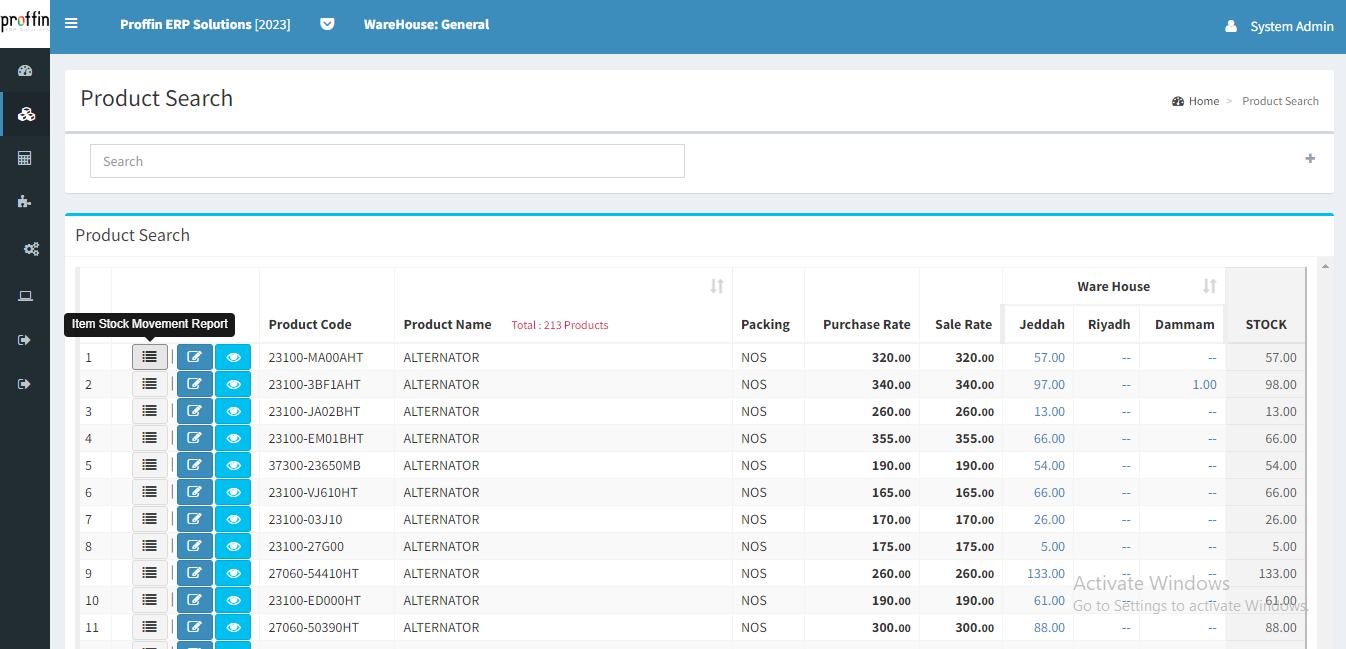
To edit the product click button.

This report lists item details that were involved in a transaction. The report also shows the inventory location that each item came from, and where it was moved to (destination location).
To access Stock Movement Details, from the side menu select IMS → REPORTS → Stock Reports → Stock Movement Details
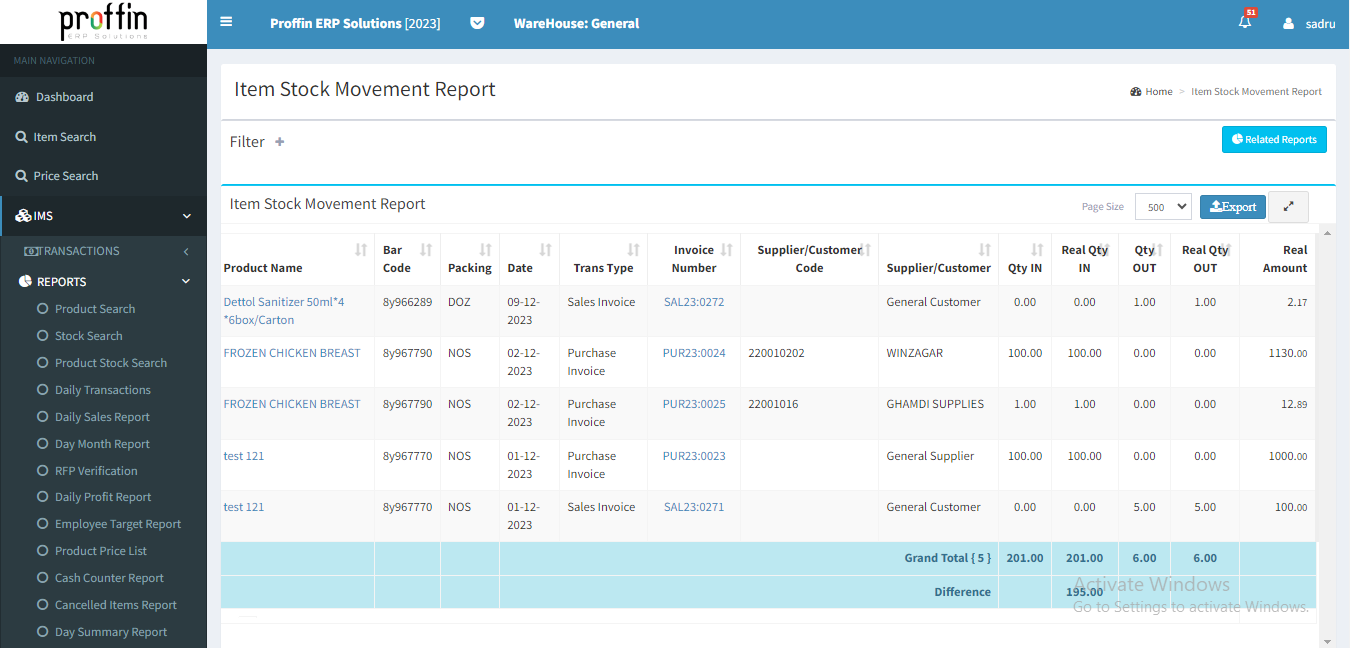
An Item Stock Report is a document that provides detailed information about the inventory levels and status of specific items or products within a business. This report is essential for inventory management and helps businesses keep track of stock levels, identify trends, and make informed decisions about restocking, ordering, and sales strategies.
To access Stock Movement Details, from the side menu select IMS → REPORTS → Stock Reports →Real Stock Reports → Item Stock

Barcode printing in an inventory management system refers to the process of generating and printing barcode labels to uniquely identify and track items.
To access Stock Movement Details, from the side menu select IMS → TOOLS → Barcode Printing

→ While searching invoice numbers, displays the products associated with that specific invoice.
→ Click button to add items and Use to remove rows.
→ To print barcode click button.

A sales invoice is a commercial document issued by a business to its customers upon the completion of a sale. It includes essential details related to the transaction, serving as a formal record of the products provided, their corresponding quantities, prices, and any applicable taxes or discounts etc.
Users can create, edit or delete Sales Invoices as per their necessity.
To access Sales Invoices, from the side menu select IMS → TRANSACTIONS → Sales Invoice

To create a sales invoice, Enter all the mandatory fields and then click
All mandatory fields are marked with *
Click button to add multiple item details and use to remove the row.

To edit an existing sales invoice , enter all the mandatory fields and then click

To delete an existing sales invoice , click .

Warehouse transfer refers to the movement of inventory items from one warehouse to another within the same organization.
But users can create, edit or delete Warehouse-Transfer as per their necessity.
To access Warehouse-Transfer, from the side menu select IMS → TRANSACTIONS → Sub-Transactions → Warehouse Transfer

To create a new warehouse-transfer , Click on New Transfer Request Transaction and enter all the mandatory fields and then click
All mandatory fields are marked with *
Click button to add multiple item details and use to remove the row.

To edit an existing warehouse-transfer , enter all the mandatory fields and then click

To delete an existing warehouse-transfer , click .

To show existing details of warehouse-transfer, click button.

To print existing details of warehouse-transfer, click button.

To access Received Warehouse-Transfer, from the side menu select IMS → REPORTS →Transaction Details → Sub-Transactions → RECEIVED
Users can Approve or Reject Warehouse-Transfer

To Approve warehouse-Transfer, click button.
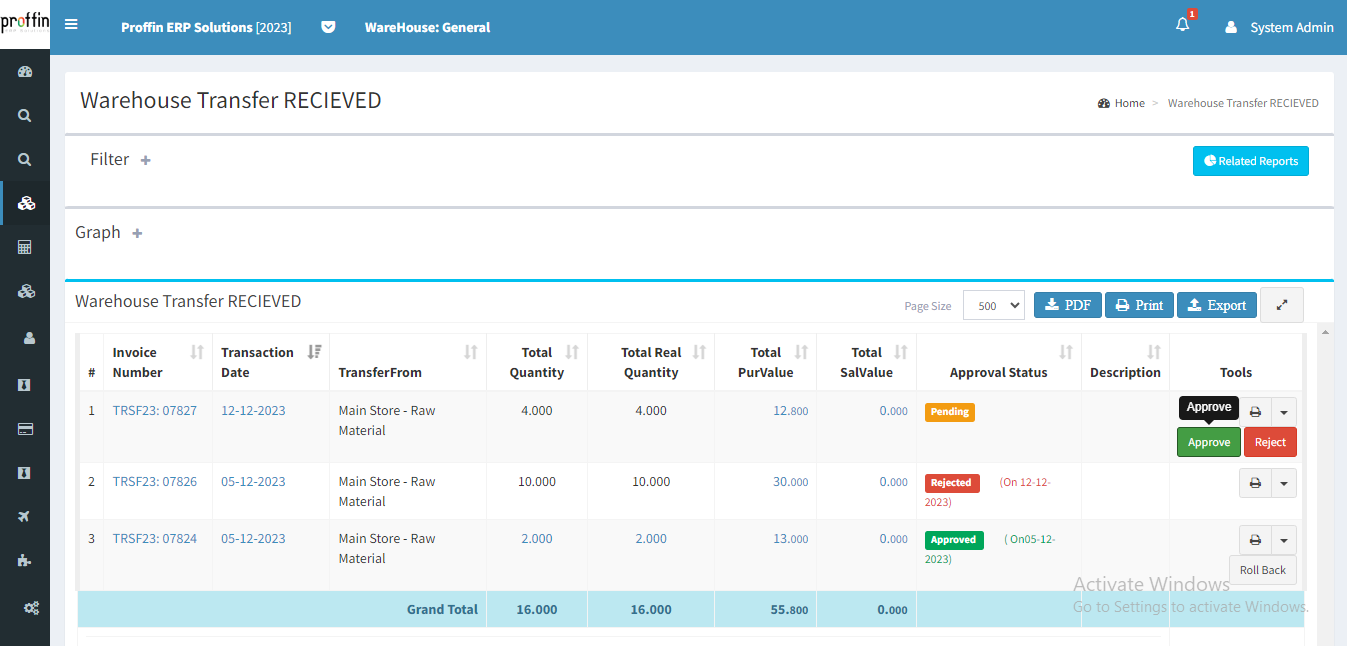
To Reject warehouse-Transfer, click button.
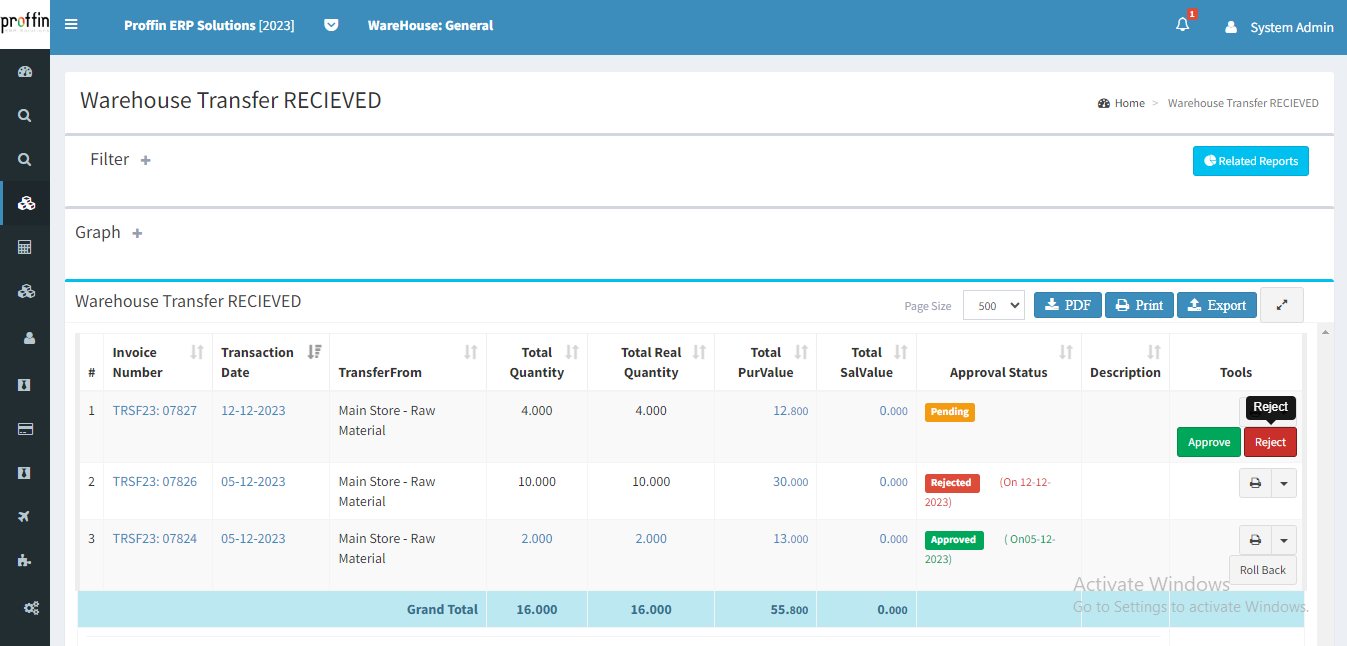
To print existing details of warehouse-transfer, click button.

An adjustment in an inventory management system usually involves making changes to the quantity or value of inventory items at a more granular level than the overall transaction.
But users can create, edit or delete Adjustment as per their necessity.
To access Adjustment, from the side menu select IMS → TRANSACTIONS → Sub-Transactions → Adjustment

To create a new adjustment , Click on New Adjustment Transaction and enter all the mandatory fields and then click
All mandatory fields are marked with *
Click button to add multiple items and use to remove the row.

To edit an existing adjustment , enter all the mandatory fields and then click

To delete an existing adjustment, click .

To show existing details of adjustment, click button.

To print existing details of adjustment, click button.

Allowance register is a record that contains detailed information about the various allowances provided to employees as part of their compensation package. It helps employers and HR professionals track, document, and manage allowances for each employee, ensuring accurate payroll processing and compliance with labor laws and company policies.
But users can create, edit or delete Allowance as per their necessity.
To access Allowance, from the side menu select PAYROLL → Transactions → Allowance Register

To create a new allowance , Click on Add New and enter all the mandatory fields and then click
All mandatory fields are marked with *

To edit an existing allowance , enter all the mandatory fields and then click

To delete an existing allowance , click .

Recovery register is a record used to track and document any deductions or recoveries made from an employee's salary or wages for various reasons. These deductions are typically made to repay debts or recover overpayments. The recovery register helps employers and HR professionals ensure that these deductions are accurately and fairly applied in compliance with labor laws and company policies.
But users can create, edit or delete Recoveries as per their necessity.
To access Recoveries, from the side menu select PAYROLL → Transactions → Recovery Register

To create a new recovery , Click on Add Recovery and enter all the mandatory fields and then click
All mandatory fields are marked with *

To edit an existing recovery , enter all the mandatory fields and then click

To delete an existing recovery , click .

Attendance process involves tracking and recording the hours worked by employees to calculate their wages or salaries accurately. It directly affects an employee's compensation
To access Attendance Processing, from the side menu select PAYROLL → Transactions → Attendance Processing

→ There will be multiple employees in this list
→ Users can calculate attendance of an employee by selecting the check box ( ) of the corresponding employee and click the button to calculate the attendance of selected employee.
→ Users can also edit the Leave taken and Over Time Works by the employee. Total Leave will be recalculated accoringly.
→ Click button to recalculate the attendance of employee.
→ Users can select and deselect all employee by clicking Select All and Deselect All.
→ Click button for calculating selected employee attendance
→ To update individual details of employee click , and click to update the details of selected employee.
A payslip is a document provided to employees by their employer each time they are paid. It outlines the details of an employee's compensation for a specific pay period. Payslips are essential for both employees and employers as they provide transparency and documentation regarding an employee's earnings and deductions.
To access Payslip, from the side menu select PAYROLL → Transactions → PayBill

→ There will be multiple employees in this list
→ Users can process details of an employee by selecting the check box ( ) of the corresponding employee .
→ Users can select and deselect all employee by clicking Select All and Deselect All.
→ Click button to process paybill of selected employees.
Payslip Drop used for removing a previously processed paybill from a payroll or accounting system. This could be necessary in case of errors, or other situations where the paybill needs to be reversed or corrected.
To access Payslip Drop, from the side menu select PAYROLL → Transactions → PayBill Drop

→ Users can drop details of an employee by selecting the check box ( ) of the corresponding employee .
→ Users can select and deselect all employee by clicking Select All and Deselect All.
→ Click button to Drop payslip of selected employees.
Payslip Payment typically refers to the actual payment an employee receives as a result of their work, as detailed on their payslip. It represents the net amount of money that an employee is paid after all deductions (such as taxes, benefits, and other withholdings) have been subtracted from their gross earnings.
To access Payslip Payment, from the side menu select PAYROLL → Transactions → Payslip Payment

→ Users can pay payment of an employee by selecting the check box ( ) of the corresponding employee .
→ Users can edit the paying amount and choose payment mode.
→ Click button to save the payslip payment details.
This report provides a concise overview of attendance data for a specific month. It is commonly used to track and analyze attendance patterns, monitor employee attendance, and ensure compliance with attendance policies. This report is crucial for accurately calculating and processing payroll, as it helps ensure that employee attendance is reflected correctly in their compensation.
To access Monthly Attendance Summary Report, from the side menu select PAYROLL → REPORTS → Monthly Attendance Summary

→ Users can print and export the all data by using and button
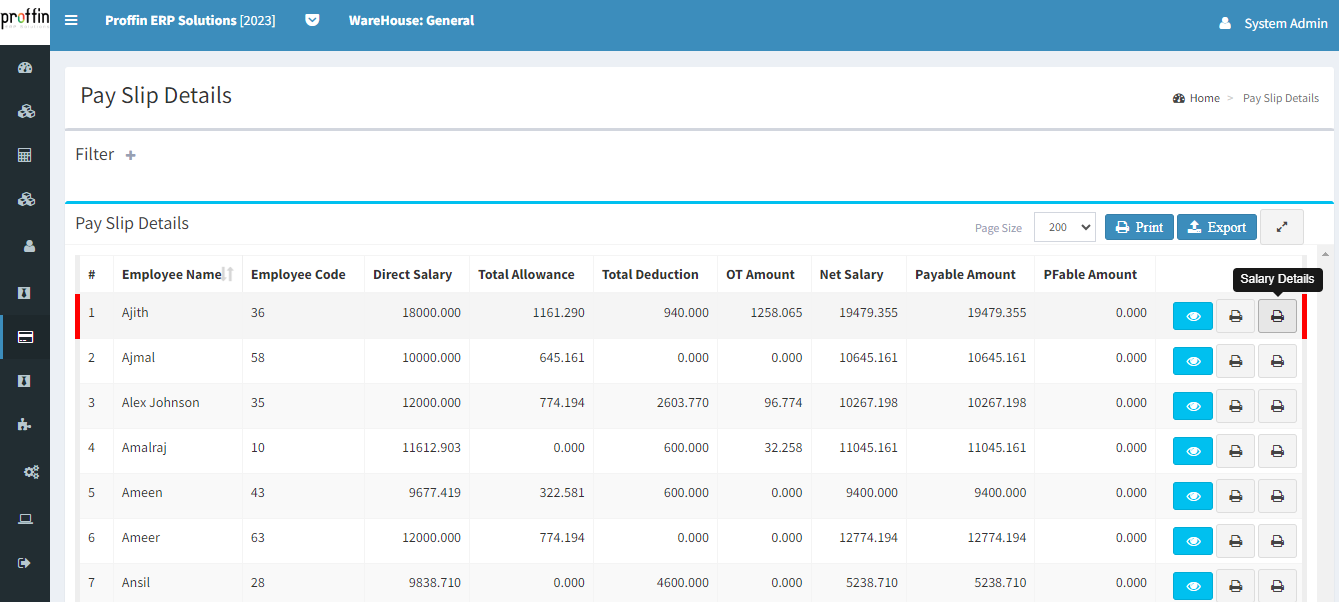
Payslip reports are essential for both employees and employers. Employees use them to understand how their compensation is calculated and to keep track of their financial transactions related to employment.
To access Payslip Report, from the side menu select PAYROLL → REPORTS → Payslip Report

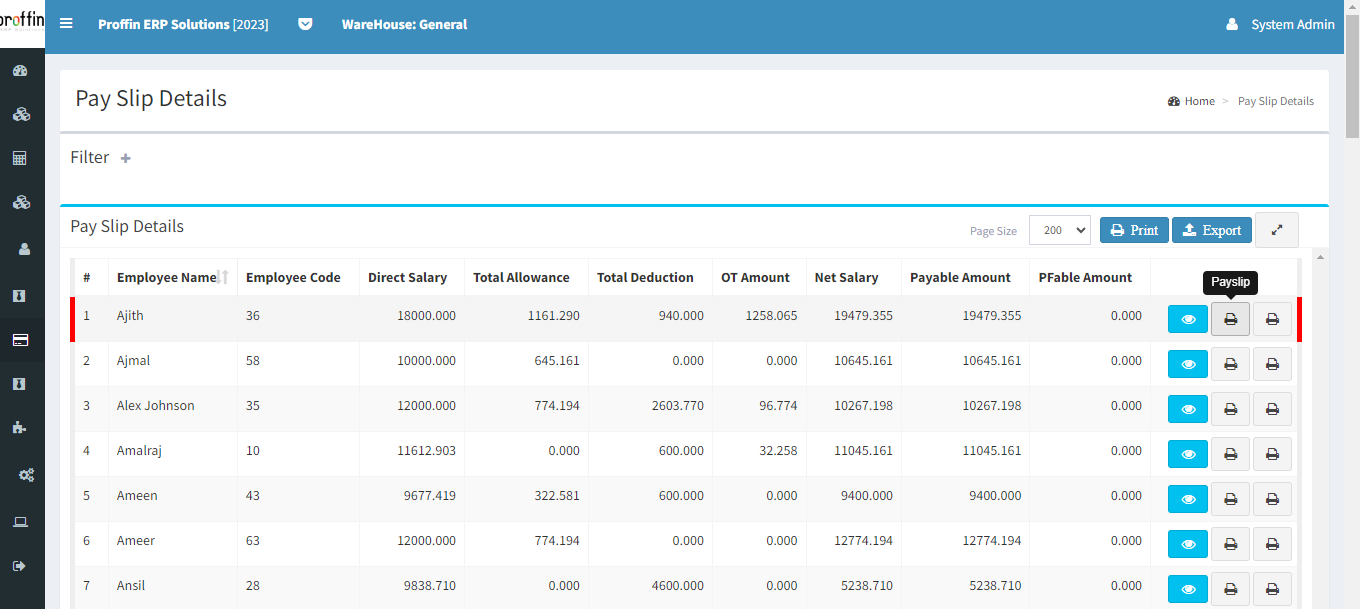
Click to print Salary details of an employee.
Allowance typically refers to a specific type of payment or deduction that affects an employee's compensation. These allowances are often used to adjust an employee's gross pay to arrive at their net pay after accounting for various factors.
But users can create, edit or delete Allowance as per their necessity.
To access Allowance, from the side menu select PAYROLL → Payroll Settings → Allowance

To create a new Allowance , Click on Add Allowance and enter all the mandatory fields and then click
All mandatory fields are marked with *

To edit an existing allowance , enter all the mandatory fields and then click

To delete an existing allowance , click .

Deductions refer to the various amounts that are subtracted or withheld from an employee's gross pay to calculate their net pay or take-home pay. These deductions can include both mandatory and voluntary deductions.
But users can create, edit or delete Deduction as per their necessity.
To access Deduction, from the side menu select PAYROLL → Payroll Settings → Deduction

To create a new deduction , Click on Add Deduction and enter all the mandatory fields and then click
All mandatory fields are marked with *

To edit an existing deduction , enter all the mandatory fields and then click

To delete an existing deduction , click .

Salary particulars refer to the detailed components that make up an employee's total salary or compensation package. These particulars outline how an employee's gross pay is calculated and what deductions or additions are made to arrive at their net pay.
But users can create, edit or delete Salary Particulars as per their necessity.
To access Salary Particular, from the side menu select PAYROLL → Payroll Settings → Salary Particular Master

To create a new salary particular , Click on Add SalaryParticular and enter all the mandatory fields and then click
All mandatory fields are marked with *

To edit an existing salary particular , enter all the mandatory fields and then click

To delete an existing salary particular , click .

Salary rule is a set of guidelines or calculations used to determine how an employee's salary or wages are calculated. These rules help organizations automate the payroll process, ensuring that employees are paid accurately and in compliance with relevant labor laws and company policies.
But users can create, edit or delete Salary Rule as per their necessity.
To access Salary Rule, from the side menu select PAYROLL → Payroll Settings → Salary Rule Master

To create a new salary rule , Click on Add Salary Rule and enter all the mandatory fields and then click
All mandatory fields are marked with *

To edit an existing salary rule , enter all the mandatory fields and then click

To delete an existing salary rule , click .

Employee-wise salary refers to the specific compensation or earnings associated with an individual employee. In this each employee's salary details are recorded separately, reflecting their unique compensation package, deductions, and additional earnings.
But users can create, edit or delete employee-wise salary as per their necessity.
To access employee-wise salary, from the side menu select PAYROLL → Payroll Settings → Employeewise Salary

To create a new employee-wise salary , Click on New and enter all the mandatory fields and then click
All mandatory fields are marked with *

To edit an existing employee-wise salary details , enter all the mandatory fields and then click

To delete an existing employee-wise salary , click .

To show existing details of employee-wise salary , click button.

Department is a crucial component of organizations responsible for managing various aspects related to employees and the workplace. With this approach, the organization can easily identify which department employees belong to.
Users can create, edit or delete Department as per their necessity.
To access Department, from the side menu select HRMS → Masters → Departments

To create a new Department, Click on Add Department and enter all the mandatory fields and then click
All mandatory fields are marked with *

To edit an existing Department , Click on Edit and enter all the mandatory fields and then click

To delete an existing Department , click .

Branch refers to a division, unit, or subsidiary of a company or organization. Branches are often geographically dispersed and can have their own specific functions, responsibilities, and management.
Users can create, edit or delete Branch as per their necessity.
To access Branch, from the side menu select HRMS → Masters → Branch

To create a new Branch, Click on Add Branch and enter all the mandatory fields and then click
All mandatory fields are marked with *

To edit an existing Branch , Click on Edit and enter all the mandatory fields and then click

To delete an existing Branch , click .

Designation in HRMS refers to a formal and specific job title or position within an organization's hierarchy. It is a part of the employee's profile and is used to categorize and identify their role within the company.
Users can create, edit or delete Designation as per their necessity.
To access Designation, from the side menu select HRMS → Masters → Designation

To create a new Designation, Click on Add Designation and enter all the mandatory fields and then click
All mandatory fields are marked with *

To edit an existing Designation , Click on Edit and enter all the mandatory fields and then click

To delete an existing Designation , click .

Employee Type refers to a classification or categorization system used to differentiate employees based on various criteria or characteristics. Employee types are typically defined to streamline HR processes, facilitate reporting, and ensure that HR policies and practices are appropriately applied to different groups of employees.
Users can create, edit or delete Employee Type as per their necessity.
To access Employee Type, from the side menu select HRMS → Masters → Employee Type

To create a new Employee Type, Click on Add Employee Type and enter all the mandatory fields and then click
All mandatory fields are marked with *

To edit an existing Designation , Click on Edit and enter all the mandatory fields and then click

To delete an existing Employee Type , click .

Employee Master refers to a classification or categorization system used to differentiate employees based on various criteria or characteristics. Employee Masters are typically defined to streamline HR processes, facilitate reporting, and ensure that HR policies and practices are appropriately applied to different groups of employees.
Users can create, edit or delete Employee as per their necessity.
To access Employee, from the side menu select HRMS → Masters → Employee Master

To create a new Employee, Click on Add Employee and enter all the mandatory fields and then click
All mandatory fields are marked with *

To edit an existing Employee, Click on Edit and enter all the mandatory fields and then click

To delete an existing Employee, click .

Salary Month refers to a specific period for which an employee's salary is calculated and paid.
Users can create or edit Salary Month as per their necessity.
To access Salary Month, from the side menu select HRMS → Masters → Salary Month

To create a new salary month, Click on Add Salary Month and enter the number of Working Days and then click
All Working Days fields are mandatory

Users can edit existing salary month before process the Payslip.
To edit an existing salary month, enter working days then click

To show existing details of salary month, click button.

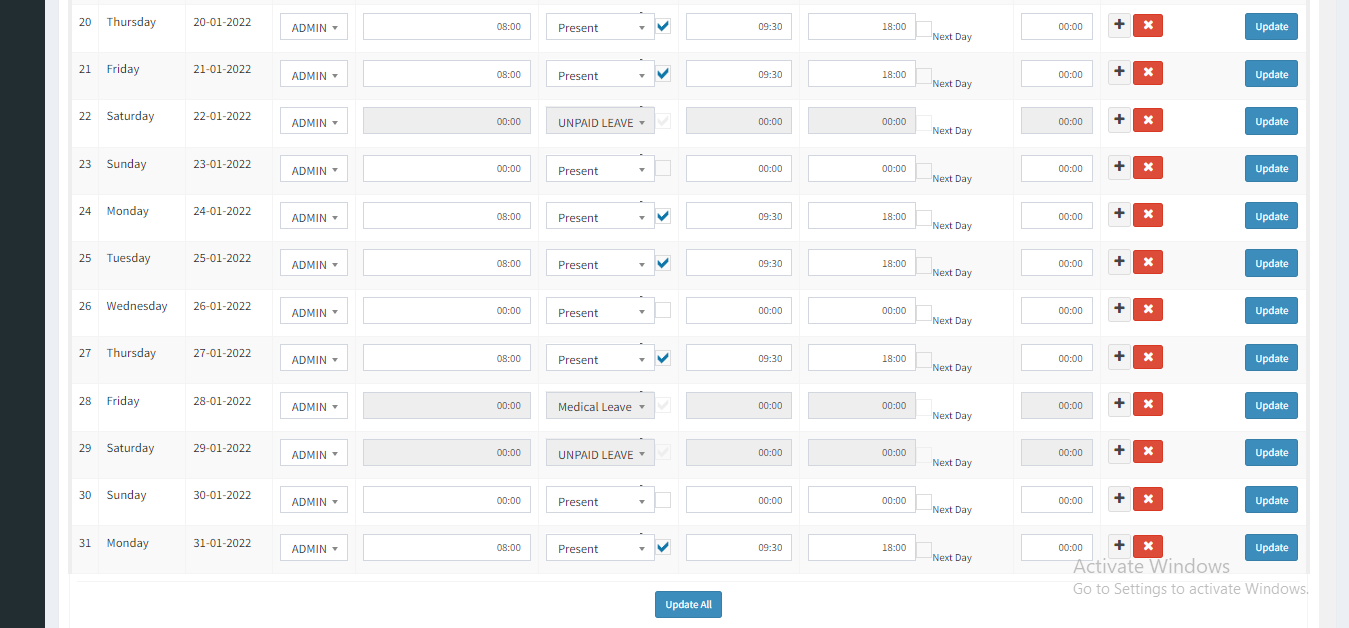
Daily Attendance - EmployeeWise used for tracking and managing the daily work attendance of employees on an individual basis. This helps HR departments track employee punctuality, leave, and other attendance-related data.
To access Employee-wise attendance, from the side menu select HRMS → Attendance → Employee wise
→ Users can edit Daily Attendance details of employees.
→ Click button to clear data of that corresponding row.
→ To update Daily Attendance details of an employee click , and click to update Daily Attendance details of all employees.

The date-wise attendance module serves as a comprehensive tool for tracking and managing employee attendance efficiently. This feature provides a user-friendly interface that allows HR administrators, managers, and employees to access and analyze attendance data on a daily basis.
To access Date-wise attendance, from the side menu select HRMS → Attendance → Date wise

→ Users can edit Date-wise attendance details of employees.
→ Click button to clear data of that corresponding row.
→ To update individual attendance click , and click to update all selected attendance.
Off-day policies refer to the rules and guidelines an organization establishes for managing employee time off, including vacation, sick leave, holidays, and other types of paid or unpaid leave. These policies are typically documented within the software to automate and streamline the process of requesting, approving, tracking, and managing employee absences.
Users can create, edit or delete Off-Day Policies as per their necessity.
To access Off-Day, from the side menu select HRMS → Attendance → Attendance Settings → Off-Day

To create a new off-day policy, Click on Add New Off-Day Policies and enter all the mandatory fields and then click
All mandatory fields are marked with *

To edit an existing off-day policy , Click on Edit and enter all the mandatory fields and then click

To delete an existing off-day policy , click .

To apply off-day policy, click Apply Off-Day Policies

→ Users can apply off-day policy of an employee by selecting the check box ( ) of the corresponding employee .
→ Users can select and deselect all employee by clicking Select All and Deselect All.
→ All mandatory fields are marked with *
→ To apply off-day policy of an employee click , and click apply off-day policy to all selected employees.
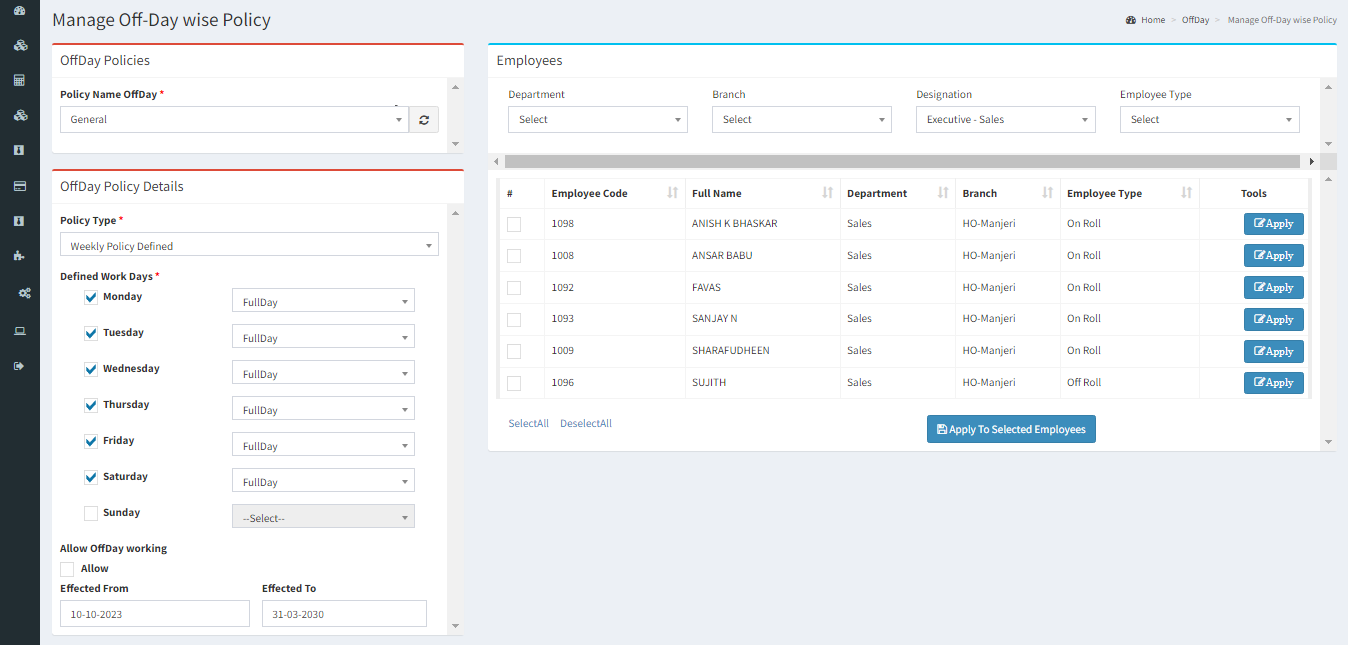
To delete an applied off-day policy , click .
Click Add New to apply policies.
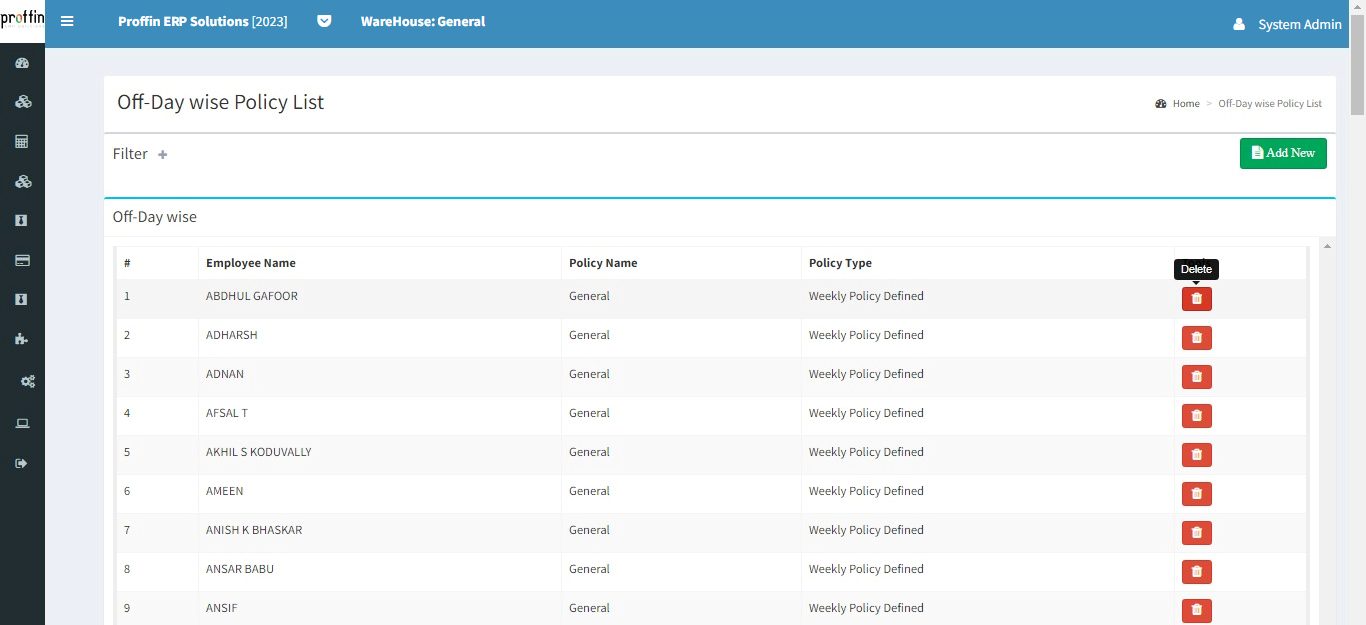
Work shifts refer to the schedules or time periods during which employees are expected to work. Work shifts are an essential component of managing employee attendance, tracking their hours, and ensuring that your organization's staffing needs are met efficiently.
Users can create, edit or delete Work Shift Policies as per their necessity.
To access Work Shift, from the side menu select HRMS → Attendance → Attendance Settings → Work Shift

To create a new work shift policy, Click on Add New Work Shifts Policy and enter all the mandatory fields and then click
All mandatory fields are marked with *

To edit an existing work shift policy , Click on Edit and enter all the mandatory fields and then click

To delete an existing work shift policy , click .

To apply work shift policy, click Apply Work Shifts Policy

→ Users can apply work shift policy of an employee by selecting the check box ( ) of the corresponding employee .
→ Users can select and deselect all employee by clicking Select All and Deselect All.
→ All mandatory fields are marked with *
→ To apply work shift policy of an employee click , and click apply work shift policy to all selected employees.

To delete an applied work shift policy , click .
Click Add New to apply policies.

Holiday typically refers to a specific day on which employees are granted time off from work with pay. It is a day when the workplace is closed, and employees are not required to report for duty.
Users can create, edit or delete Holidays as per their necessity.
To access Holidays, from the side menu select HRMS → Attendance → Attendance Settings → Holiday

To create a new holiday, Click on Add Holidays and enter all the mandatory fields and then click
All mandatory fields are marked with *

To edit an existing holiday , Click on Edit and enter all the mandatory fields and then click

To delete an existing holiday , click .

To apply holiday, click Apply Holidays

→ Users can apply holiday of an employee by selecting the check box ( ) of the corresponding employee .
→ Users can select and deselect all employee by clicking Select All and Deselect All.
→ All mandatory fields are marked with *
→ To apply holiday of an employee click , and click apply holiday to all selected employees.

To delete an applied holiday , click .
Click Add New to apply holidays.

Over Time refers to the additional hours worked by employees beyond their regular working hours or in excess of the maximum allowable hours within a specified time frame, such as a workweek. Overtime is typically associated with increased compensation for employees.
Users can create, edit or delete Over Time Policies as per their necessity.
To access Over Time Policy, from the side menu select HRMS → Attendance → Attendance Settings → Over Time

To create a new over time policy, Click on Add New over time policies and enter all the mandatory fields and then click
All mandatory fields are marked with *

To edit an existing over time policy , Click on Edit and enter all the mandatory fields and then click

To delete an existing over time policy , click .

To apply over time policy, click Apply over time policies

→ Users can apply over time policy of an employee by selecting the check box ( ) of the corresponding employee .
→ Users can select and deselect all employee by clicking Select All and Deselect All.
→ All mandatory fields are marked with *
→ To apply over time policy of an employee click , and click apply holiday to all selected employees.

To delete an applied over time policy , click .
Click Add New to apply holidays.

Leave application used by employees to request time off from work. It typically includes essential information such as the employee's name, the type of leave (e.g., vacation, sick leave), the dates requested and the reason for the leave. This form serves as a written record of the request and helps employers manage their workforce's time off efficiently while ensuring compliance with company policies.
Users can create, edit or delete Leave as per their necessity.
To access Leave Application, from the side menu select Leave → Leave Application

To apply a Leave ,Click on Add Claim New enter all the mandatory fields and then click
All mandatory fields are marked with *

To edit an existing Leave , enter all the mandatory fields and then click

To delete an existing leave , click .
Users can not edit or delete approved leave.

To show existing leave details , click button.

Leave types refer to categories or classifications of employee time off or leave. Different types of leave are established to accommodate various reasons for employees needing time away from work.
Users can create, edit or delete Leave Type as per their necessity.
To access Leave Type, from the side menu select HRMS → Leave → Leave Type Master

To create a new leave type, Click on Add Leave Type and enter all the mandatory fields and then click
All mandatory fields are marked with *

To edit an existing leave type , Click on Edit and enter all the mandatory fields and then click

To delete an existing leave type , click .

To show existing details of leave type, click button.

Leave rules are concise policies and guidelines that define how employee leave is managed.
Users can create, edit or delete Leave Rule as per their necessity.
To access Leave Rule, from the side menu select HRMS → Leave → Leave Rules

To create a new leave rule, Click on Add Leave Rules and enter all the mandatory fields and then click
All mandatory fields are marked with *
User can add multiple Leave Types under a leave rule. Click to add multiple leave types.

To edit an existing leave rule , Click on Edit and enter all the mandatory fields and then click

To delete an existing leave rule , click .

Applying leave rules ensures that employees can request time off while adhering to company-specific rules and legal requirements.
Users can apply, change, edit or delete Leave Rules as per their necessity.
To access Work Shift, from the side menu select HRMS → Attendance → Attendance Settings → Apply Leave Rules
To apply Leave Rules, click Apply Leave Rules and for Change leave rules click on Change leave rules.

→ Users can apply or change leave rule of an employee by selecting the check box ( ) of the corresponding employee .
→ Users can select and deselect all employee by clicking Select All and Deselect All.
→ All mandatory fields are marked with *
→ To apply or change leave rule of an employee click , and click apply or change leave rules to all selected employees.

To edit an applied leave rule , Click on Edit and enter all the mandatory fields and then click

To delete an applied leave rule , click .

This report provides a comprehensive analysis of employee attendance, allowing users to filter data based on a specific month and year. It includes both an aggregate view of total hours worked during the selected period and a detailed breakdown of daily hours for each employee.
To access Attendance Report, from the side menu select HRMS → Report → Attendance Report

→ Users can download all data in excel format by using button

This report offers a comprehensive view of employee attendance, allowing users to filter data based on a specific month and year. It includes a detailed breakdown of daily attendance, incorporating distinct leave codes for each day.
To access Attendance Report Code-wise, from the side menu select HRMS → Report → Attendance Report Code-wise

→ Users can download all data in excel format by using button

This report provides a detailed breakdown of employee overtime, allowing users to filter data based on a specific month and year. It includes both an aggregate view of total overtime hours worked during the selected period and a day-wise breakdown of overtime hours for each employee.
To access Overtime Attendance Report, from the side menu select HRMS → Report → Overtime Attendance Report

→ Users can download all data in excel format by using button

Nationality refers to the categorization of employees based on their citizenship or country of origin.
Users can create, edit or delete Nationality as per their necessity.
To access Nationality, from the side menu select HRMS → Others → Nationality

To create a new nationality, Click on Add Nationality and enter all the mandatory fields and then click
All mandatory fields are marked with *

To edit an existing nationality , Click on Edit and enter all the mandatory fields and then click

To delete an existing nationality , click .

State is a specific administrative division within the country.
Users can create, edit or delete State as per their necessity.
To access State, from the side menu select HRMS → Others → State

To create a new state, Click on Add State and enter all the mandatory fields and then click
All mandatory fields are marked with *

To edit an existing state , Click on Edit and enter all the mandatory fields and then click

To delete an existing state , click .

City refers to the specific urban area or municipality where an employee resides or is primarily based for work purpose.
Users can create, edit or delete City as per their necessity.
To access City, from the side menu select HRMS → Others → City

To create a new city, Click on Add City and enter all the mandatory fields and then click
All mandatory fields are marked with *

To edit an existing city , Click on Edit and enter all the mandatory fields and then click

To delete an existing city , click .

In some cases, organizations may choose to include an employee's blood group in their records. However, this practice is not common and is typically reserved for specific situations where knowing an employee's blood type is essential for safety or health-related reasons, as mentioned earlier.
Users can create, edit or delete Blood Group as per their necessity.
To access Blood Group, from the side menu select HRMS → Others → Blood Group

To create a new blood group, Click on Add blood group and enter all the mandatory fields and then click
All mandatory fields are marked with *

To edit an existing blood group , Click on Edit and enter all the mandatory fields and then click

To delete an existing blood group , click .

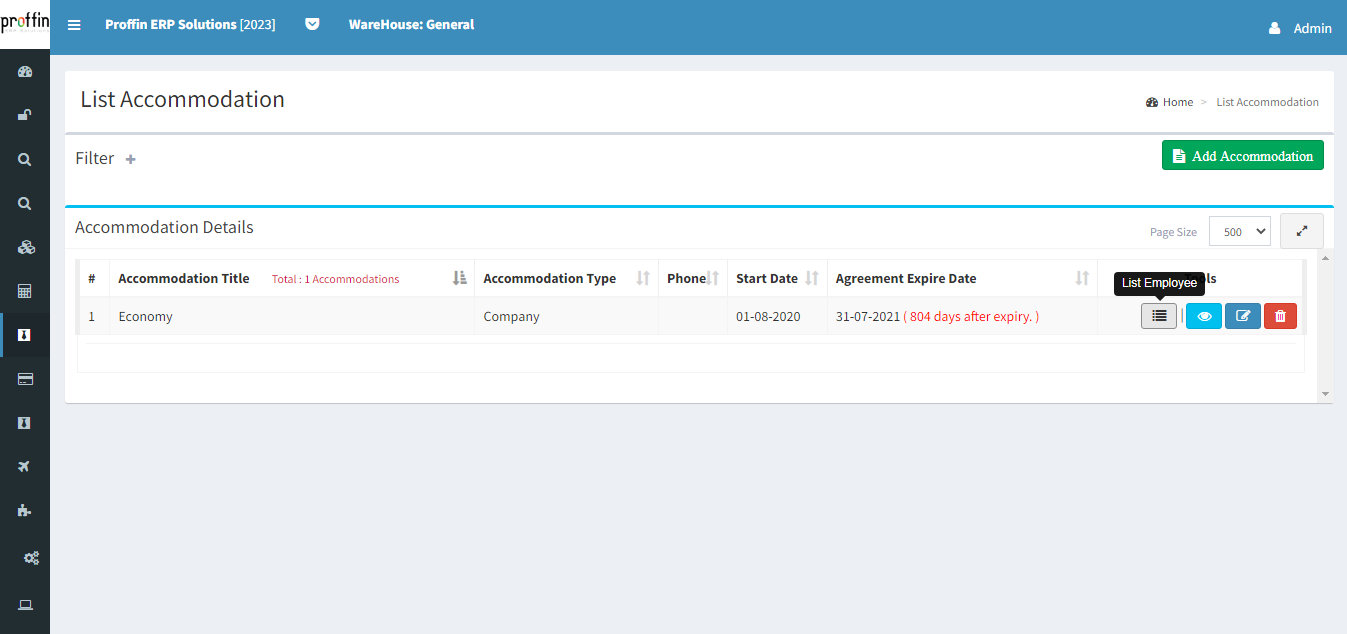
Accommodation typically refers to providing workplace accommodations for employees with disabilities or special needs. These accommodations are designed to ensure that all employees have equal access to job opportunities, perform their job functions effectively, and participate fully in the workplace.
Users can create, edit or delete Accommodation as per their necessity.
To access Accommodation, from the side menu select HRMS → Masters → Accommodation

To create a new accommodation, Click on Add Accommodation and enter all the mandatory fields and then click
All mandatory fields are marked with *

To edit an existing accommodation , Click on Edit and enter all the mandatory fields and then click

To delete an existing accommodation , click .

To show existing details of accommodation, click button.

To see the list of employees provided by the accommodation, click button.
Grade typically refers to a classification or level that is assigned to employees based on various factors, such as their job responsibilities, skills, experience, and performance. These grades help organizations establish a structured framework for compensation, career progression, and other HR-related processes.
Users can create, edit or delete Grade as per their necessity.
To access City, from the side menu select HRMS → Masters → Grade

To create a new grade, Click on Add City and enter all the mandatory fields and then click
All mandatory fields are marked with *

To edit an existing grade , Click on Edit and enter all the mandatory fields and then click

To delete an existing grade , click .

Employee bank stores information related to employee's bank details, including Bank Name, Branch, Bank Code and Routine Code.
Users can create, edit or delete Employee Bank as per their necessity.
To access City, from the side menu select HRMS → Masters → Employee Bank

To create an employee bank, Click on Add City and enter all the mandatory fields and then click
All mandatory fields are marked with *

To edit an existing employee bank , Click on Edit and enter all the mandatory fields and then click

To delete an existing employee bank , click .

Visa designation typically refers to a specific status or classification assigned to an employee or worker based on their visa or work authorization.
Users can create, edit or delete visa designation as per their necessity.
To access City, from the side menu select HRMS → Masters → Visa Designation

To create a new visa designation, Click on Add City and enter all the mandatory fields and then click
All mandatory fields are marked with *

To edit an existing visa designation , Click on Edit and enter all the mandatory fields and then click

To delete an existing visa designation , click .

To show existing details of visa designation, click button.


An employee profile is a concise summary that provides key information about an individual working within an organization. It typically includes essential details such as the employee's name, job title, department, and other details.
To access Profile, from the side menu Profile
Users can Edit profile details as per their necessity.

Click to expand other profile details
Users can edit their personal details as per their necessity. To edit existing personal details enter all the mandatory fields and then click

Self-attendance typically refers to the practice of employees recording their own attendance or working hours without direct oversight. In a self-attendance system, employees are responsible for tracking and reporting their own time worked, including clocking in and out for their shifts, breaks, and other work-related activities.
Users can create or delete Self Attendance as per their necessity.
To access Self Attendance, from the side menu select Attendance → Self Attendance

To Add Attendance, Click on Add New and enter all the mandatory fields and then click
All mandatory fields are marked with *

To delete an existing Attendance , click .

Self-attendance typically refers to the practice of employees recording their own attendance or working hours without direct oversight. In a self-attendance system, employees are responsible for tracking and reporting their own time worked, including clocking in and out for their shifts, breaks, and other work-related activities.
Users can create or delete Self Attendance as per their necessity.
To access Self Attendance, from the side menu select Attendance → Self Attendance

Users can edit Date-wise attendance details of employees.
Click button to clear data of that corresponding row.
To update individual attendance click , and click to update all selected attendance.

This list consists of entries showing when an employee has arrived at work, total works time, work shift and left for the day. It allows employees to document their own attendance. These records help both employees and employers keep track of working hours, ensuring accurate compensation and compliance with company policies.
To access List Self Attendance, from the side menu select Attendance → List SelfAttendance

Self Attendance Report allows individual employees to view their own attendance records on a daily basis. This report offers a comprehensive view of an employee's attendance history, showcasing their presence or absence for each workday. It empowers employees to track their punctuality and attendance patterns, promoting transparency and accountability in the workplace.
To access List Self Attendance, from the side menu select Attendance → SelfAttendance Report

Leave application used by employees to request time off from work. It typically includes essential information such as the employee's name, the type of leave (e.g., vacation, sick leave), the dates requested and the reason for the leave. This form serves as a written record of the request and helps employers manage their workforce's time off efficiently while ensuring compliance with company policies.
Users can create, edit or delete Leave as per their necessity.
To access Leave Application, from the side menu select Leave → Leave Application

To apply a Leave ,Click on Add Claim New enter all the mandatory fields and then click
All mandatory fields are marked with *

To edit an existing Leave , enter all the mandatory fields and then click

To delete an existing leave , click .
Users can not edit or delete approved leave.

To show existing leave details , click button.

Leave availability includes employee's leave balance, which reflect how much time off an employee has already used and how much is still available to them. Employees typically need to request and receive approval for leave in advance, and their available leave balance plays a crucial role in determining their eligibility for paid time off.
To access Leave Availability, from the side menu select LEAVE → Leave Availability

A claim request made by an employee is a formal application or submission typically made to an employer or HR department to seek reimbursement or compensation for expenses or entitlements related to their job. This could include expenses like travel, meals, or work-related purchases. The employee provides details about the nature of the claim, the amount being requested, and any supporting documentation, such as receipts or invoices.
Users can create, edit or delete Claim Request as per their necessity.
To access Claim Request, from the side menu select CLAIM → Claim Requests

To create a new Claim Request, Click on Add Claim Request and enter all the mandatory fields and then click
All mandatory fields are marked with *

To edit an existing claim request , enter all the mandatory fields and then click

To delete an existing Claim Request , click .

To show existing details of claim request, click button.
Users can not edit or delete approved claim request.

The claim status shows the current status (Pending ,Approved, Rejected) of a compensation claim that the employee has submitted to their employer.
To access Claim Status, from the side menu select CLAIM → Claim Status

An Action Board could serve as a central hub where users can view and manage various tasks, follow-ups, or other actions associated with customer relationships. It may provide a visual representation of the customer journey, highlighting key touchpoints and pending activities.
To access Action Board, from the side menu select CRM → Action Board
Here Users can view the list of Actions assigned to them.

To forward an action click button, Enter forward details and then click
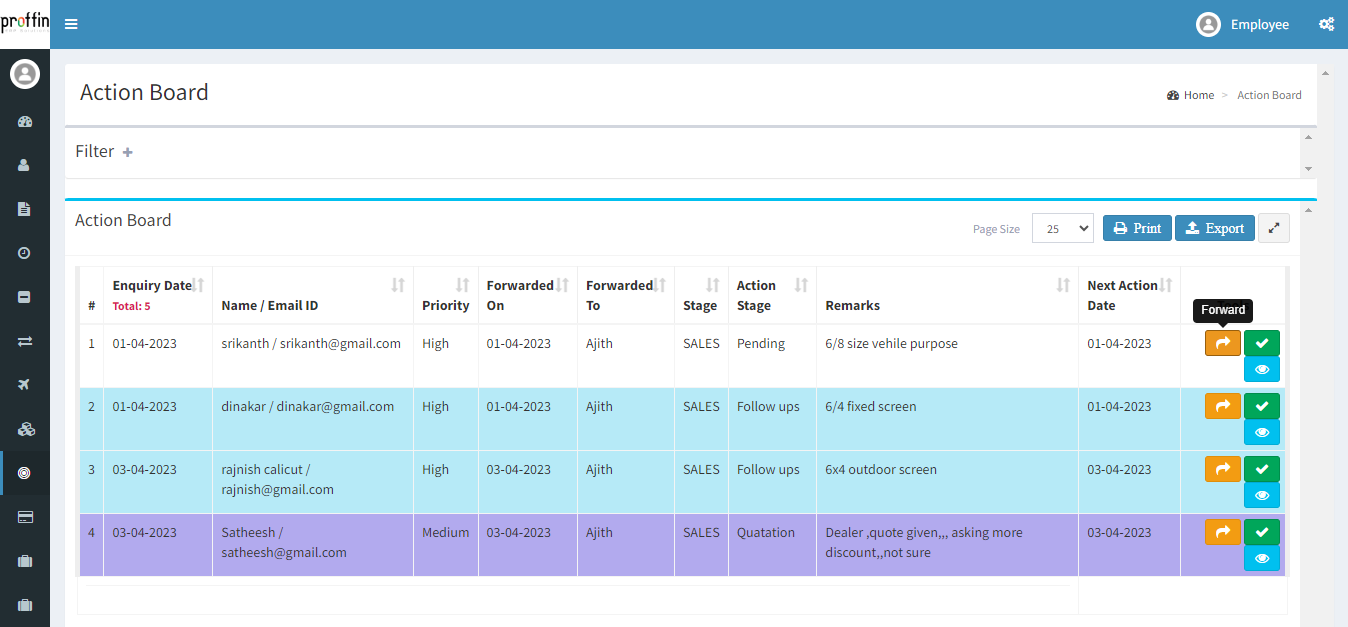
To forward an action click button, Enter action details and then click
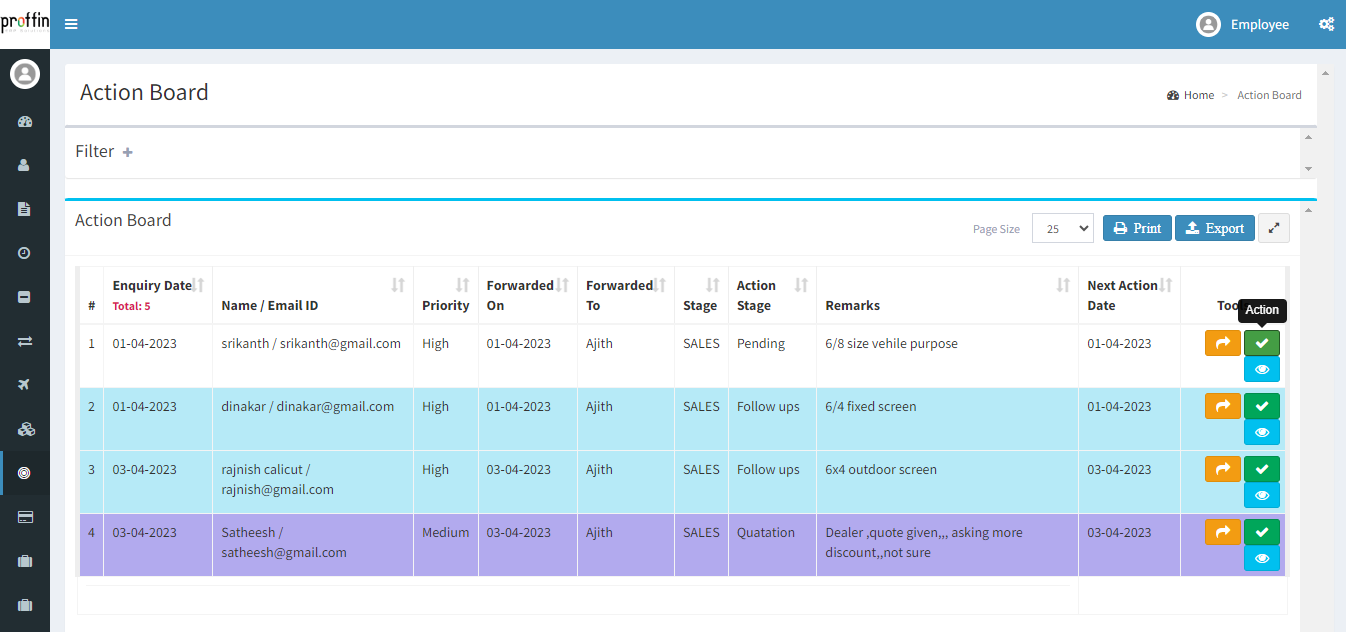
To show existing action details, click button.

The Enquiry Register serves as a comprehensive record of incoming inquiries from potential customers. It captures essential details about each inquiry, such as the source of the inquiry, contact information of the interested party, and the nature of their interest.
Users can create, edit or delete Claim Request as per their necessity.
Here Users can also view the list of Enquiries added to them.
To access Enquiry Register, from the side menu select CRM → Enquiry Register

To create a new Enquiry, Click on Add Enquiry and enter all the mandatory fields and then click
All mandatory fields are marked with *

To edit an existing Enquiry , enter all the mandatory fields and then click

To delete an Enquiry , click .

To show existing details of Enquiry, click button.

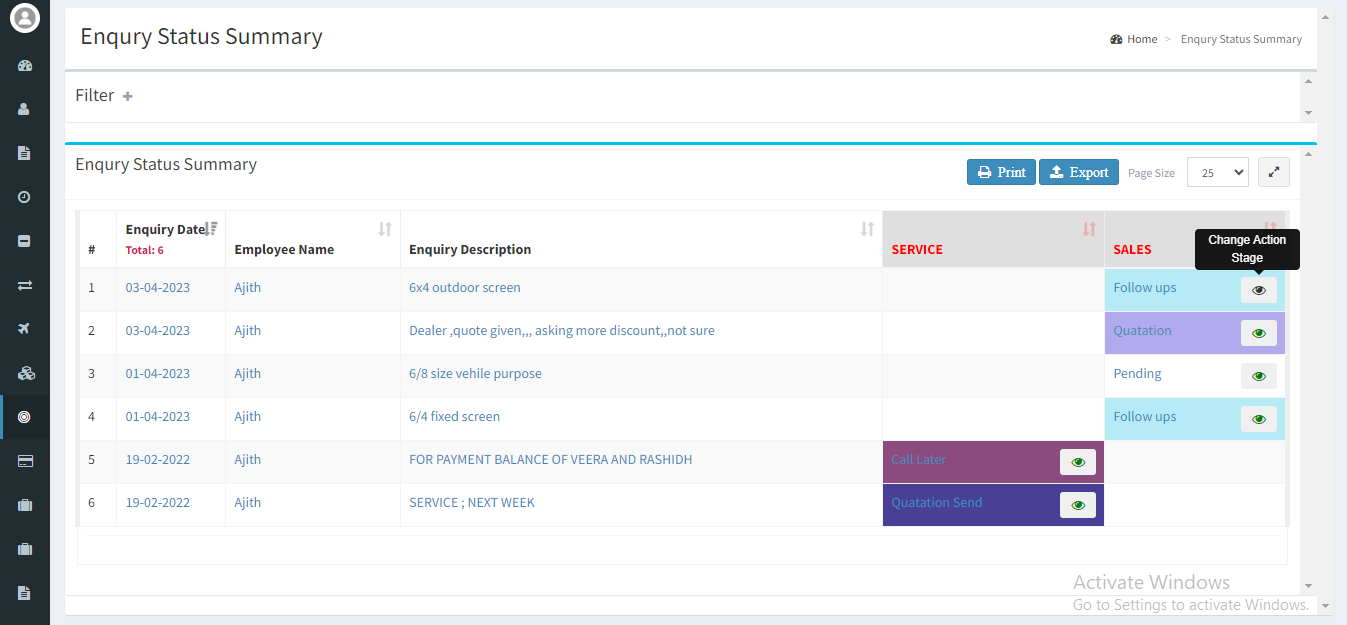
An Enquiry Status Summary is a consolidated view of the current statuses and progress of enquiries or leads.
To access Enquiry Status Summary, from the side menu select CRM → Enquiry Status Summary

To change action stage click button, Enter action stage details and then click
Action Follow Up is used to manage and monitor upcoming activities
To access Action Follow Up, from the side menu select CRM → Action Follow Up

→ Change password allows employees to change their own login passwords.
→ To access Change Password, from the side menu selectChange Password.
→ New password and Confirm password fields are mandatory.
→ Click button to update new password.
